


You’d certainly want to know how to draw a turtle if you’d vacation on Tropical Island. You see them in the see, right around you.
Turtles come so close to you that you can play with them. They are such nice and gentle creatures that it makes you excited and you want to shout out how many new sea-friends you have. Sounds familiar?
Well, I am not at the seaside right now but I can tell you that I felt really great while making this turtle drawing.
I don’t know why but it was a very pleasant experience while drawing this sea picture.
Today, I show you a few easy to follow and even easier to do steps of how to draw a turtle.
It is a sea turtle because we all like those and, I hope you’ll like it too.
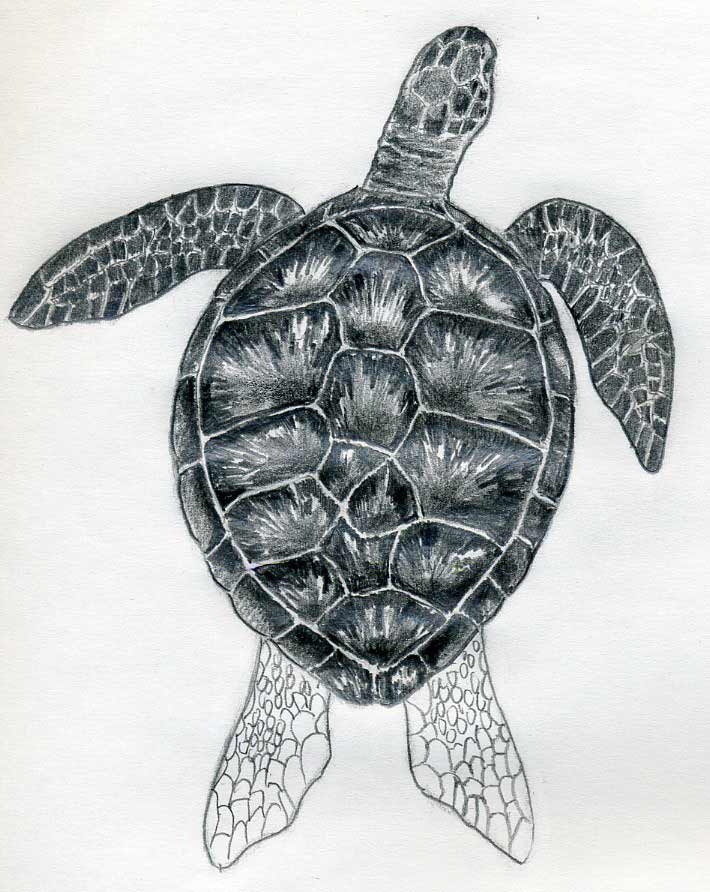
Procedure is as usual; first click on the picture and enlarge it. It opens in new tab or window. If necessary print it out.

See every possible detail you are able to notice. It may be the shape of flippers – both are in different motion, or the scutes on the shell. See where turtle turns its head.
And please (!), do not be scared because this drawing may look too complex. The following steps will clearly demonstrate the opposite.
Enjoy the ride!

See this body contour initial sketch! It is not exact at all and it is OK, I’ll correct it as we go. I am absolutely sure; you can make it even better for the first trial.


Now, notice that at this stage you’ve already learned how to draw a turtle.
All the rest looks like filling up a coloring-like page by graphite pencil, but you have ready the most important basic outline contours.

Similar as above, by weak pencil lines draw the scales on the flippers (front limbs) and, scales on the head.
Notice, that I made a weak pencil line running through the center of the head, which shows where the turtle is facing or swimming.

It is very important point! When you’ll teach someone next time how to draw a turtle please mention this detail by all means.

The skin on the neck is slightly rolled; there are no scales, so that the turtle can turn the head as needed.
The best process is to shade all scales first by the same color tone (darkness) while leaving the white borders among scales. Then you can darken them as necessary; darker or lighter.


Please shade it by short pencil strokes. It is easier and faster.

I Promise!

At this stage you should have a finished shell.
You do not need to sweat to make an exact copy of this turtle drawing, put your own creation into it too.
Remember you are not a scanner or camera, you are human and it is OK to make slight irregularities.

Do not forget to leave white border-lines among the scales…because they are scales and they need to be properly distinguished.

Great JOB! Your turtle look now really realistic and I believe your turtle drawing looks much better than mine.
Now, you know the very basic steps how to draw a turtle. Using this simple technique you are now able to draw virtually any turtle you choose.
Always remember, point is in details! Work them out diligently if possible.
Turtles come so close to you that you can play with them. They are such nice and gentle creatures that it makes you excited and you want to shout out how many new sea-friends you have. Sounds familiar?
Well, I am not at the seaside right now but I can tell you that I felt really great while making this turtle drawing.
I don’t know why but it was a very pleasant experience while drawing this sea picture.
Today, I show you a few easy to follow and even easier to do steps of how to draw a turtle.
It is a sea turtle because we all like those and, I hope you’ll like it too.
Procedure is as usual; first click on the picture and enlarge it. It opens in new tab or window. If necessary print it out.
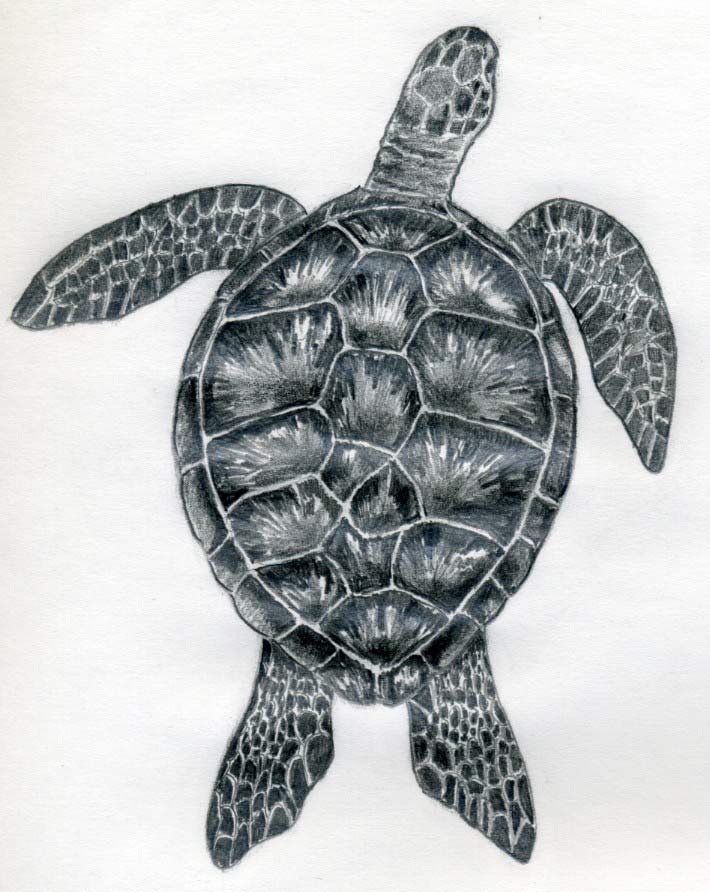
click the image to enlarge
The first step of how to draw a turtle will be in carefully observing this turtle drawing for a while.See every possible detail you are able to notice. It may be the shape of flippers – both are in different motion, or the scutes on the shell. See where turtle turns its head.
And please (!), do not be scared because this drawing may look too complex. The following steps will clearly demonstrate the opposite.
Enjoy the ride!
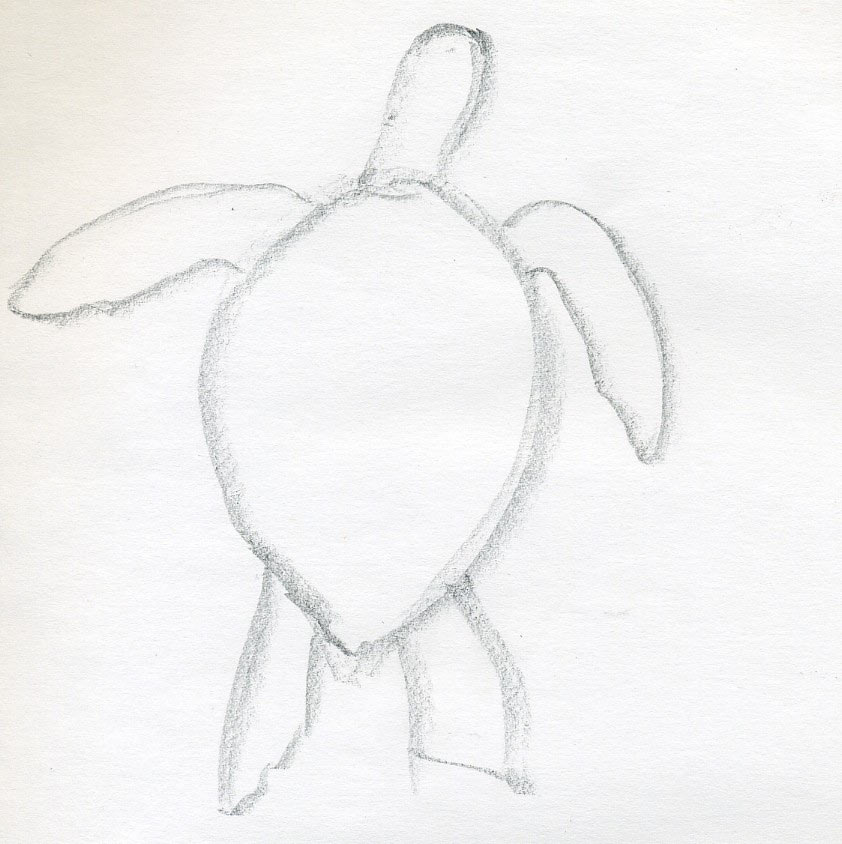
click the image to enlarge
Draw a simple outline of the body contours. A simplest outline you can. Hold the pencil tilted so that the lines are wider (thicker) so you can cover inaccuracy. See this body contour initial sketch! It is not exact at all and it is OK, I’ll correct it as we go. I am absolutely sure; you can make it even better for the first trial.
click the image to enlarge
Here I made some slight corrections. I enlarged the shell a bit, but only a very little. Now, the pen-shaped-eraser comes handy to erase excessive pencil lines.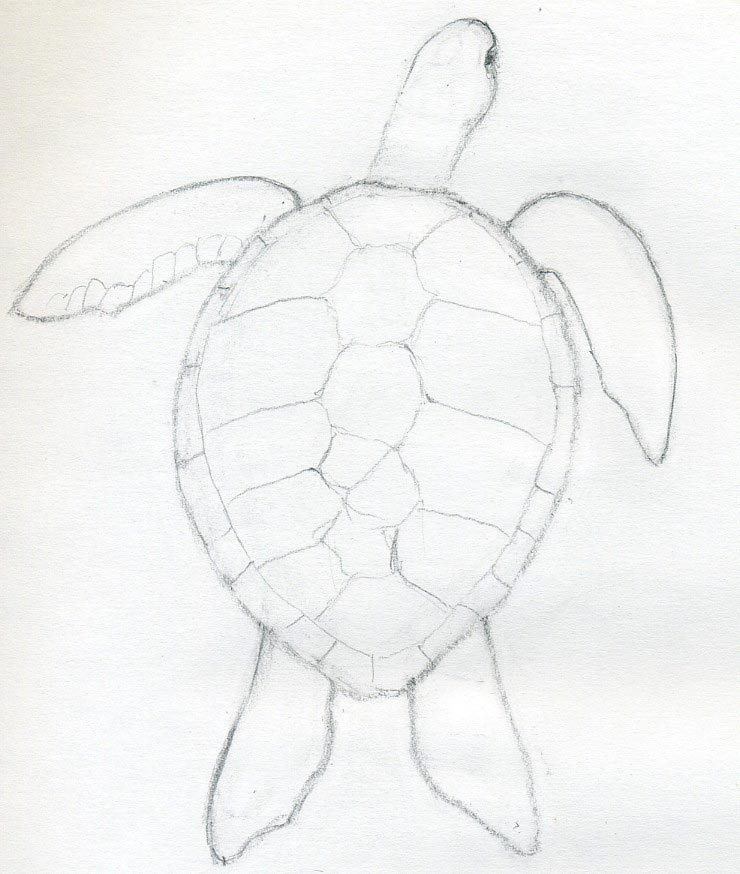
click the image to enlarge
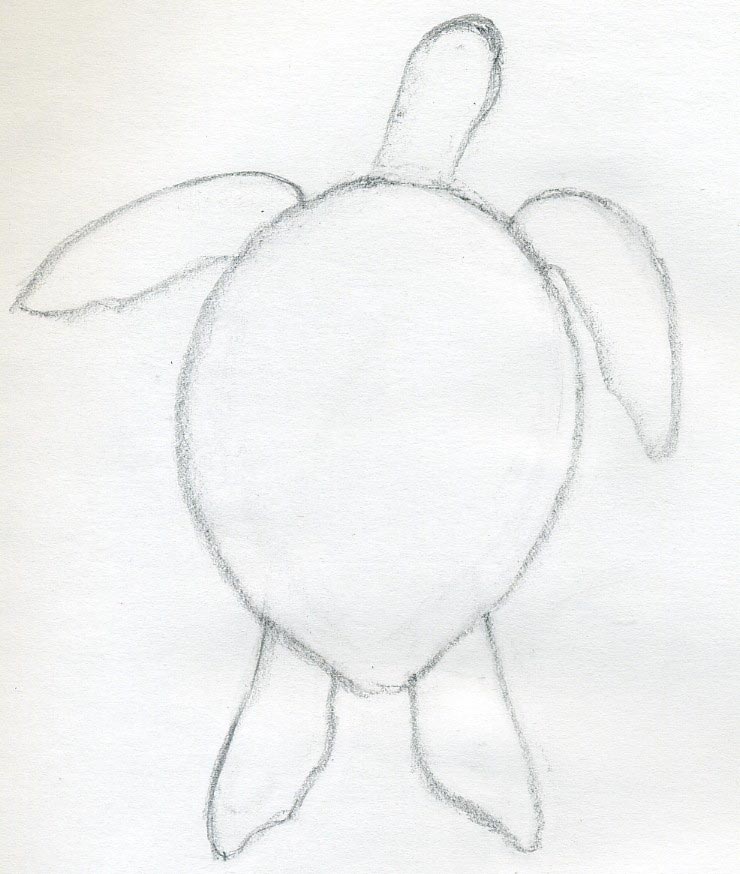
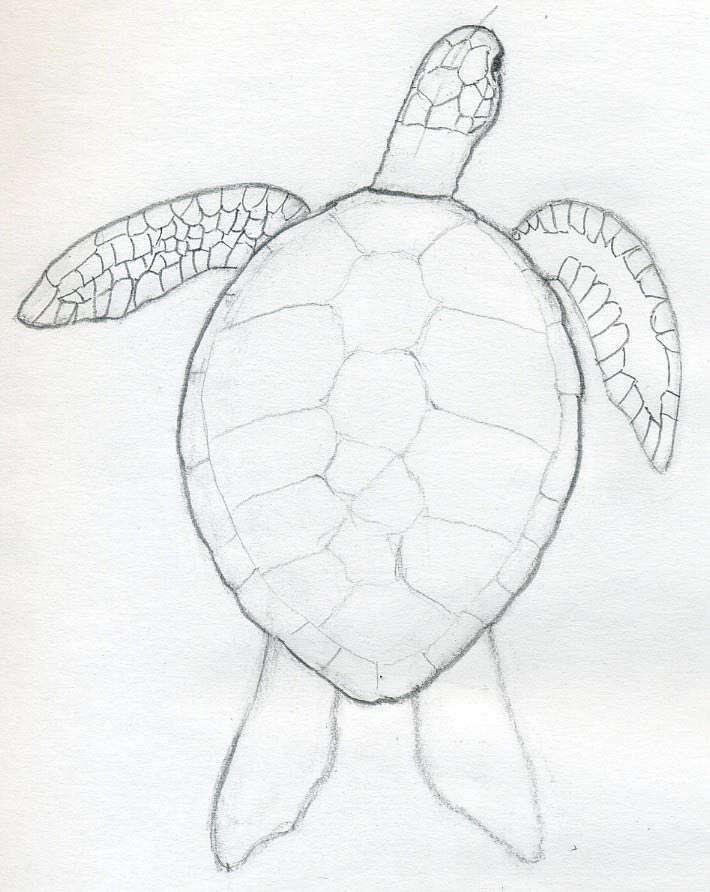
By a weak pencil line, draw the outline of scutes – those are large, scale-like structures on top of the turtle’s shell. Now, notice that at this stage you’ve already learned how to draw a turtle.
All the rest looks like filling up a coloring-like page by graphite pencil, but you have ready the most important basic outline contours.
click the image to enlarge
Similar as above, by weak pencil lines draw the scales on the flippers (front limbs) and, scales on the head.
Notice, that I made a weak pencil line running through the center of the head, which shows where the turtle is facing or swimming.
click the image to enlarge
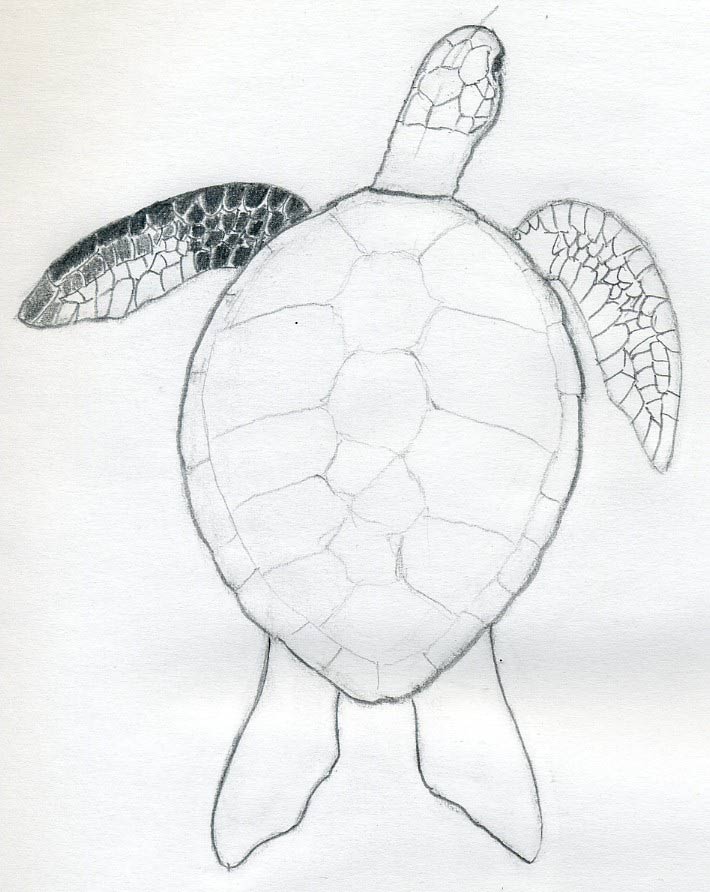
You can start to shade the scales on the flippers. Please leave a thin blank border-line among the scales. This small but important detail will give them a realistic look.It is very important point! When you’ll teach someone next time how to draw a turtle please mention this detail by all means.
click the image to enlarge
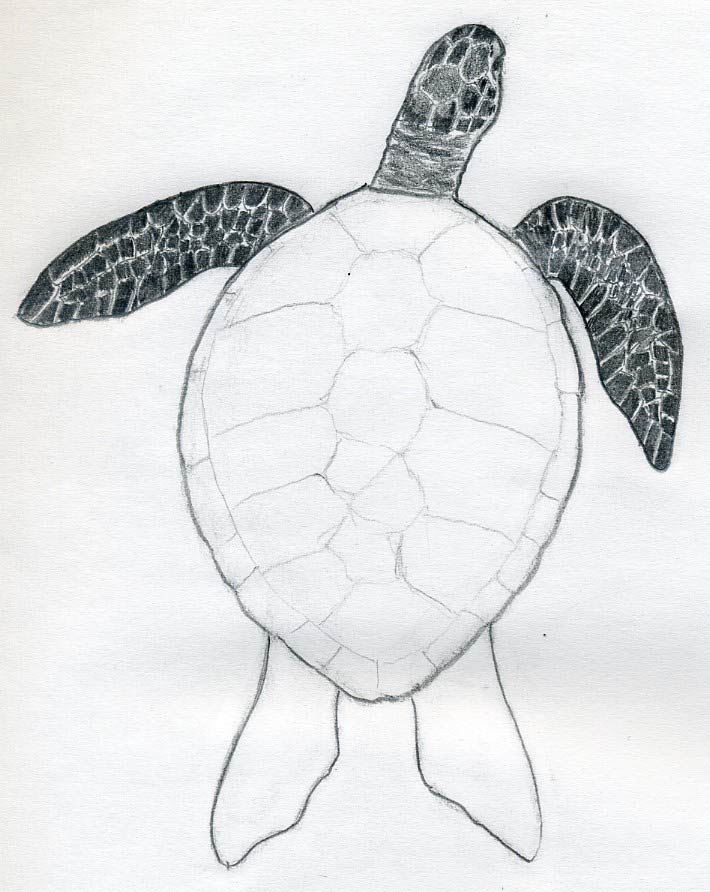
Continue shading the scales on both flippers and on the head. Also watch out, because not every scale is of he same darkness – especially on the head. The skin on the neck is slightly rolled; there are no scales, so that the turtle can turn the head as needed.
The best process is to shade all scales first by the same color tone (darkness) while leaving the white borders among scales. Then you can darken them as necessary; darker or lighter.
click the image to enlarge
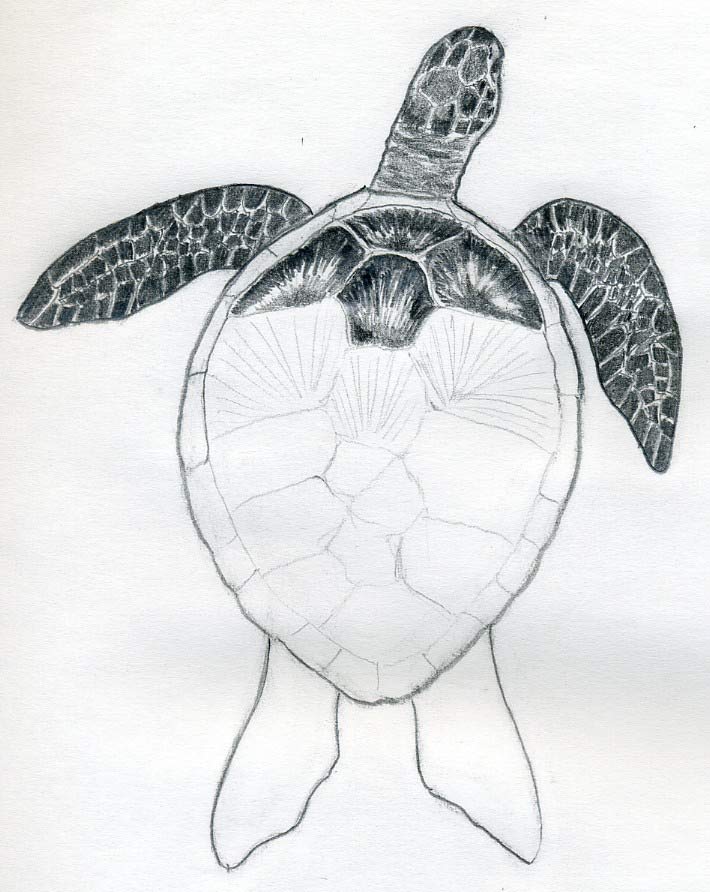
It is time to put shade on the shell’s scutes (scale-like structures). Notice the pattern on each scute goes a certain direction. As if it would be drawn into a certain point.
click the image to enlarge
Make weak pencil guidelines of direction of the pattern on every scute (see the picture). This will help and guide you while shading every scute. Please shade it by short pencil strokes. It is easier and faster.

click the image to enlarge
Continue shading and filling up the pattern on every scute. I know it is a bit time-consuming but you will have a beautiful turtle drawing when you do it this way.I Promise!
click the image to enlarge
Notice that some small irregular spots remain blank (light) on almost every scute. That is probably the part of nature’s pattern.At this stage you should have a finished shell.
You do not need to sweat to make an exact copy of this turtle drawing, put your own creation into it too.
Remember you are not a scanner or camera, you are human and it is OK to make slight irregularities.
click the image to enlarge
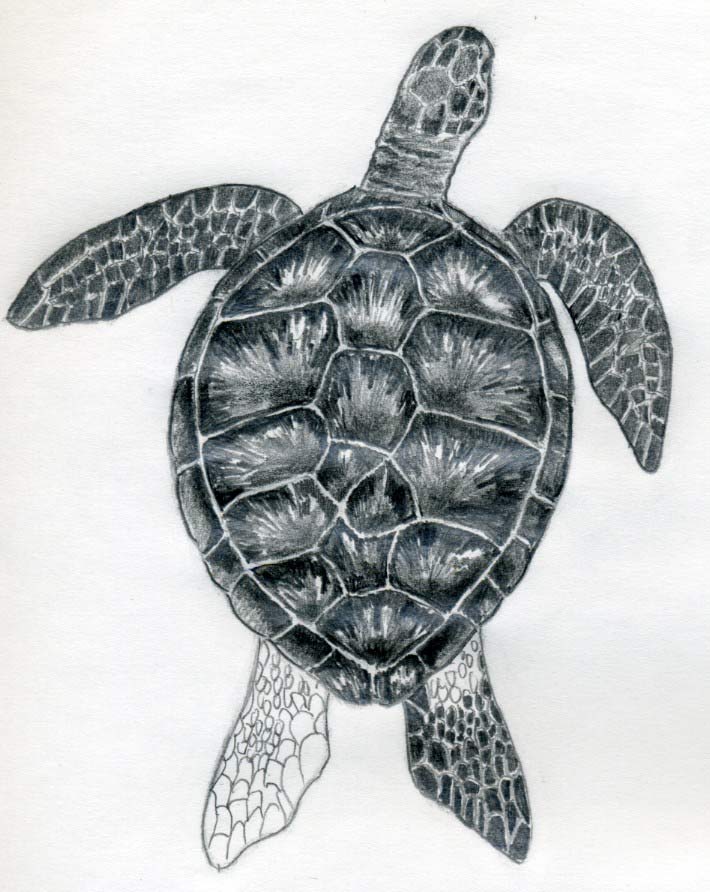
Similarly as you did on flippers, outline the scales on the rear legs by weak pencil lines. Process is the very same. Do not forget to leave white border-lines among the scales…because they are scales and they need to be properly distinguished.
click the image to enlarge
Now, you know the very basic steps how to draw a turtle. Using this simple technique you are now able to draw virtually any turtle you choose.
Always remember, point is in details! Work them out diligently if possible.
