


Let’s admit it: knowing how to draw a bird is one of the “must” skills. There are only a few common themes even children often attempt to draw almost instinctively. Bird is among them.
To learn some simple bird drawings is in fact very easy and I’ll show you here how to do it.
Once you know the basics - the “recipe” - it may surprise you how simple it is.
On the other hand an entirely different thing is if you attempt to draw a real bird or to make a real bird drawing from photo, which you want to draw realistic.
There you simply should be as exact as possible and capture every important feature.
But I can assure you, that even such seemingly “difficult” drawing is in fact simple, because the process of drawing is exactly the same as for any other object.

Please do not watch the feather layer or similar details - yet. Simply see how big is the head in comparison to the trunk, how long is the tail…and, that the beak is directed slightly upward.
Every bird – as we all perceive it – has a beak, a head, a trunk (body), two legs and a tail.

Let’s Learn How To Draw

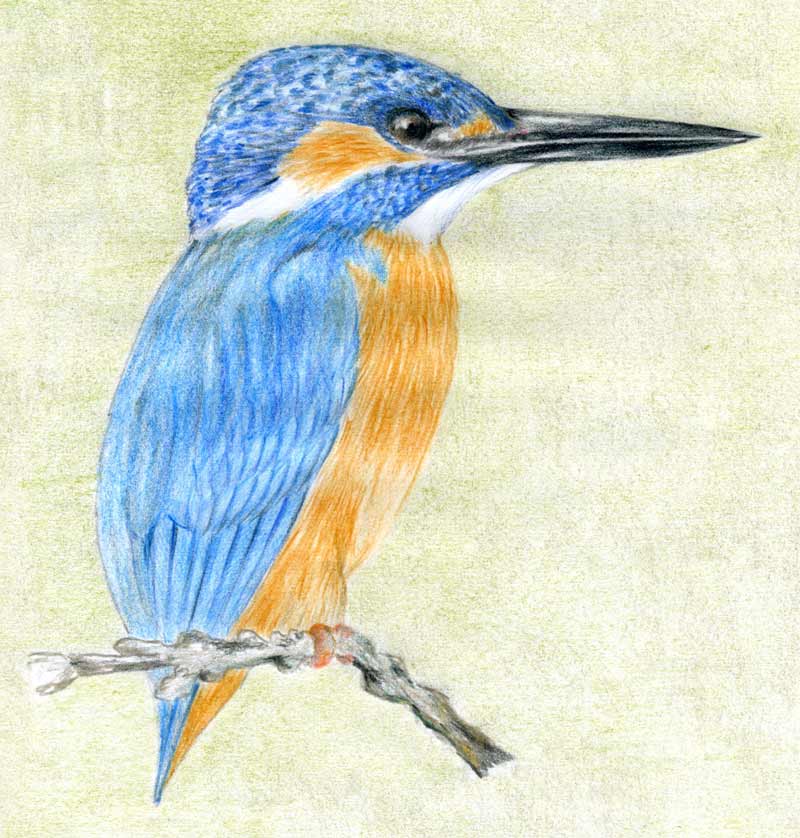
Simple; I like Kingfisher.
It’s a lovely and clever small creature and you may be lucky if you spot some in wilderness.
Besides that, Kingfisher is also an excellent and easy exercise of how to draw a bird.

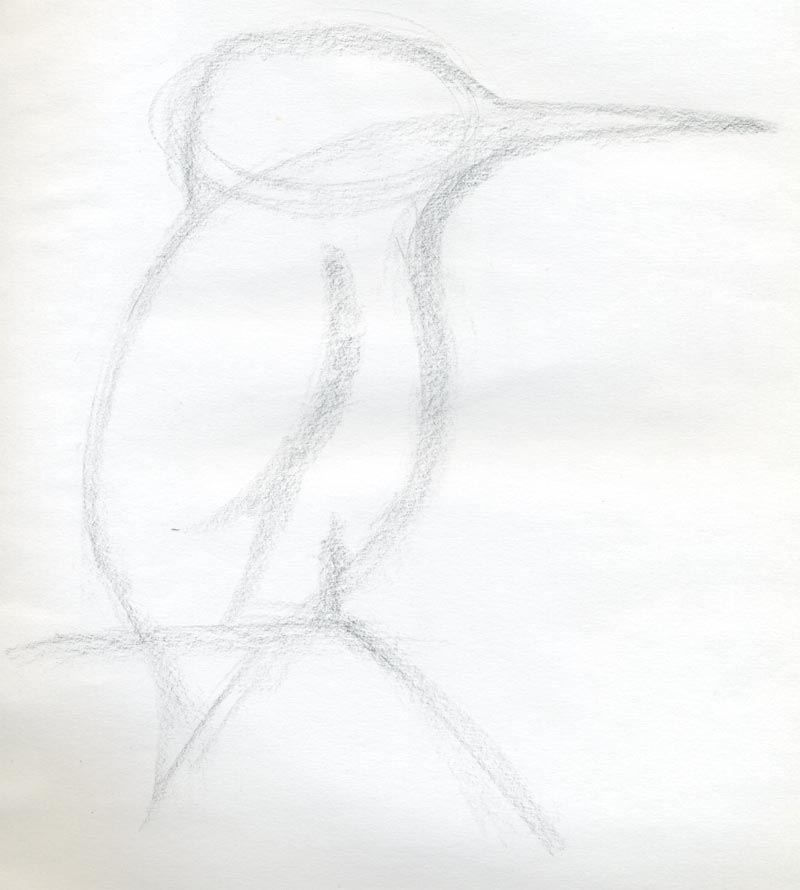
Both the head and the trunk are ellipses. You can also notice that the back curve continues directly to the beak.
It is – of course – an imaginary line, but it helps a lot to create balance and capture the best proportions.
When you draw a bird you need to seriously capture 2 basic body volumes as accurate as possible in the beginning.
Those are the head and the trunk.

Observe how each part on the body is of different color.
To learn some simple bird drawings is in fact very easy and I’ll show you here how to do it.
Once you know the basics - the “recipe” - it may surprise you how simple it is.
On the other hand an entirely different thing is if you attempt to draw a real bird or to make a real bird drawing from photo, which you want to draw realistic.
There you simply should be as exact as possible and capture every important feature.
But I can assure you, that even such seemingly “difficult” drawing is in fact simple, because the process of drawing is exactly the same as for any other object.
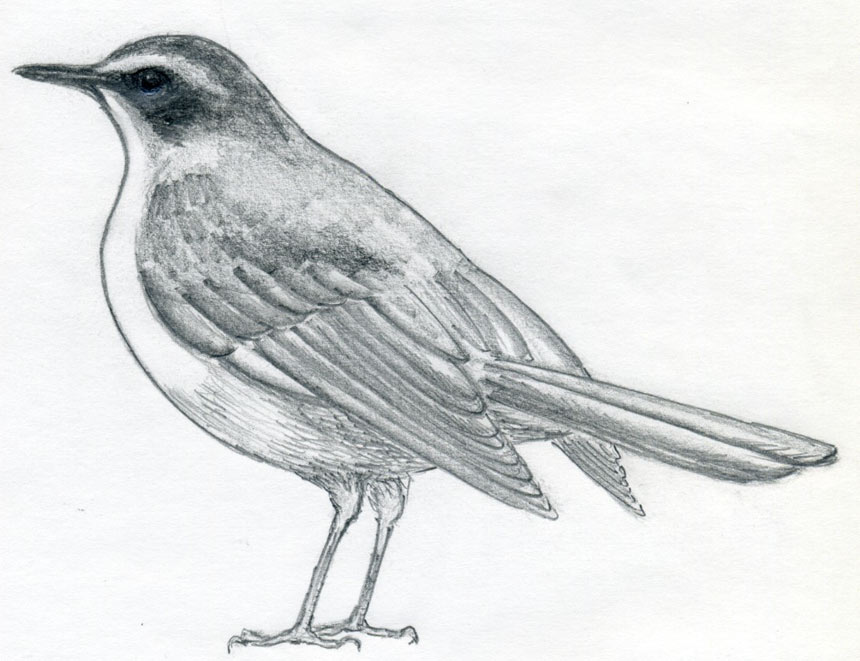
click the image to enlarge
I show you first how to draw a bird – in general, simple approach. Here you’ll quickly master the fundamentals of bird’s body.
Before drawing an outline, try to observe the bird’s body proportions on the picture above.Please do not watch the feather layer or similar details - yet. Simply see how big is the head in comparison to the trunk, how long is the tail…and, that the beak is directed slightly upward.
Every bird – as we all perceive it – has a beak, a head, a trunk (body), two legs and a tail.

click the image to enlarge
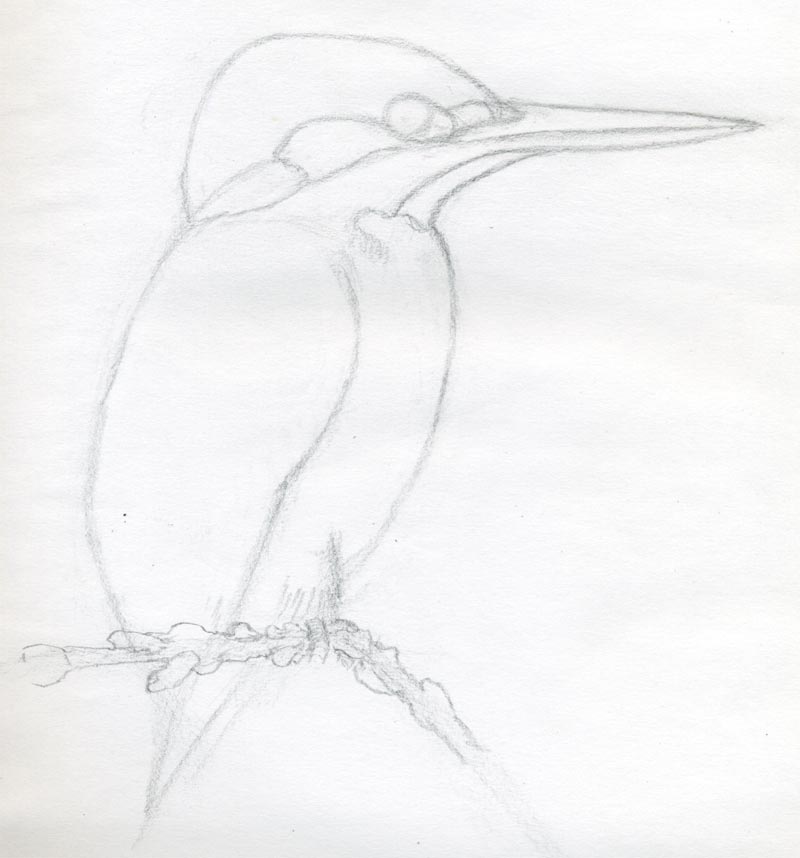
In logical order, someone may start drawing bird from the trunk and someone else from the head. I used to start to draw birds from the head, while at the same time intensely observing the proportions of both; head and trunk. These two body parts must be in good balance when you draw a bird from the very rough beginning if you want to be satisfied with your finalized drawing. Nevertheless, it is very difficult to say which way is the correct one to start with. It is individual and it also depends on your drawing skill level. I would say, also try to use your intuition a little, because drawing is a creative activity and you often cannot make it simply by following a prescribed manual. Every bird has different body proportions. For instance, kingfisher, that small tiny cute creature has the beak almost the same size as its body. In such case you should pay special attention to the size and shape of the beak because it is one of the main features on your bird drawing. 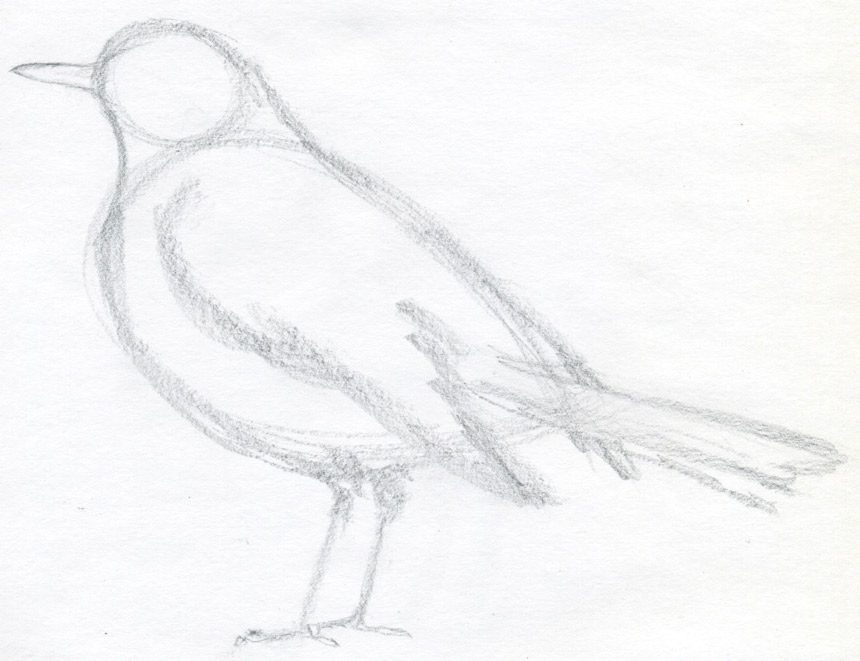 click the image to enlarge Generally, a bird’s trunk is almost always a teardrop-shaped fuselage. When you draw a bird always keep in mind that bird, in fact, is a small living airplane. As always, use tilted pencil, loose grip and your lines will be much stable and exact. Now you can join the head circle and the body fuselage together by gentle curves that will create the bird’s neck. At this stage, the drawing – sketching, is still very rough so make as many pencil lines as necessary. Add the tail, mark out the wigs – just approximately, outline the beak and draw the legs. While drawing and sketching these basic body parts, always keep your eye on the good balance and proportions of the entire drawing. At this stage you have a basic body outline of a bird. 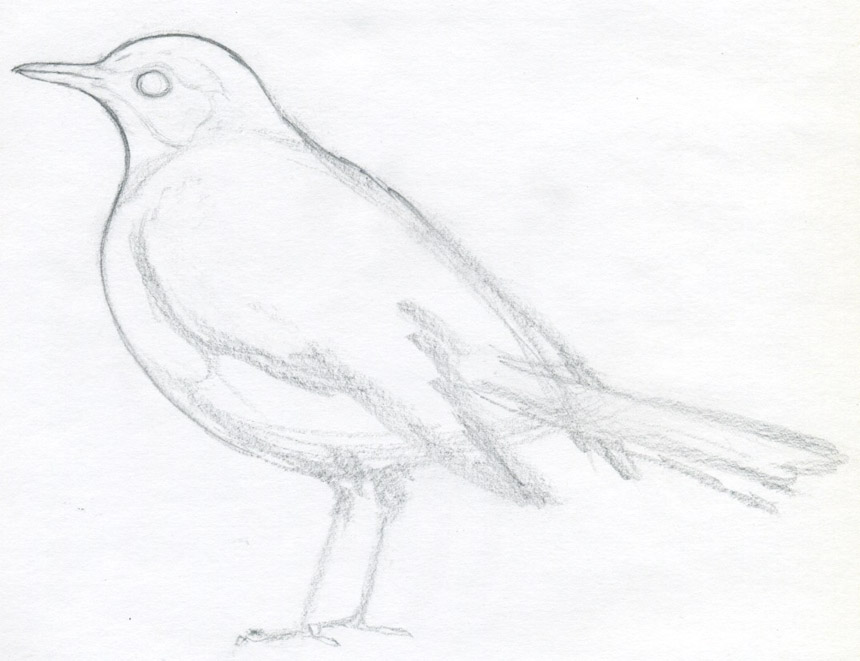 click the image to enlarge You can erase the excess pencil lines and slowly get closer to the real shape. If possible start from the head, which naturally leads you to draw the beak. 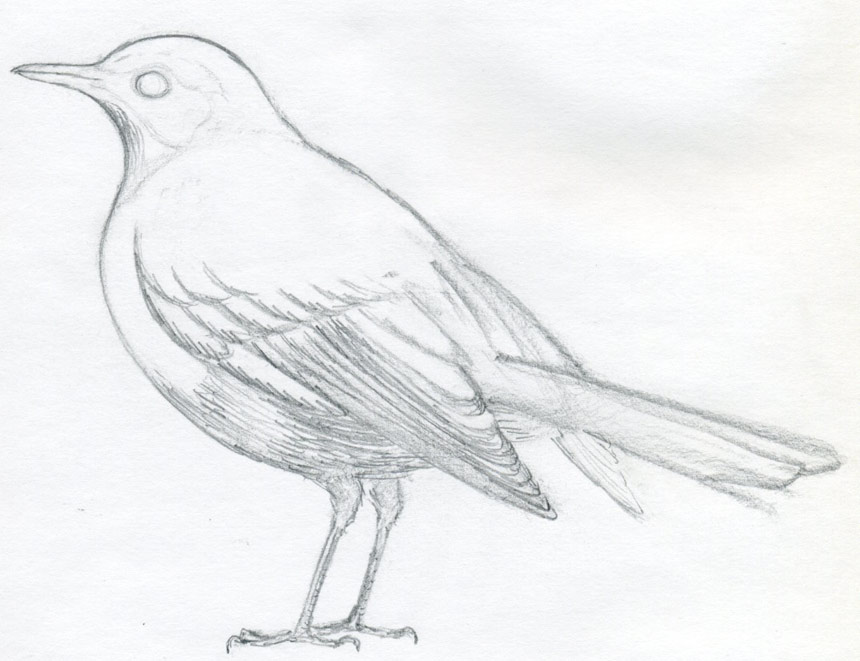 click the image to enlarge Observe once more the ready bird drawing on the top and pay special attention to the position of the eye. Note, that the eye is closer to the beak, so outline the eye first only by a weak pencil line, very gently. 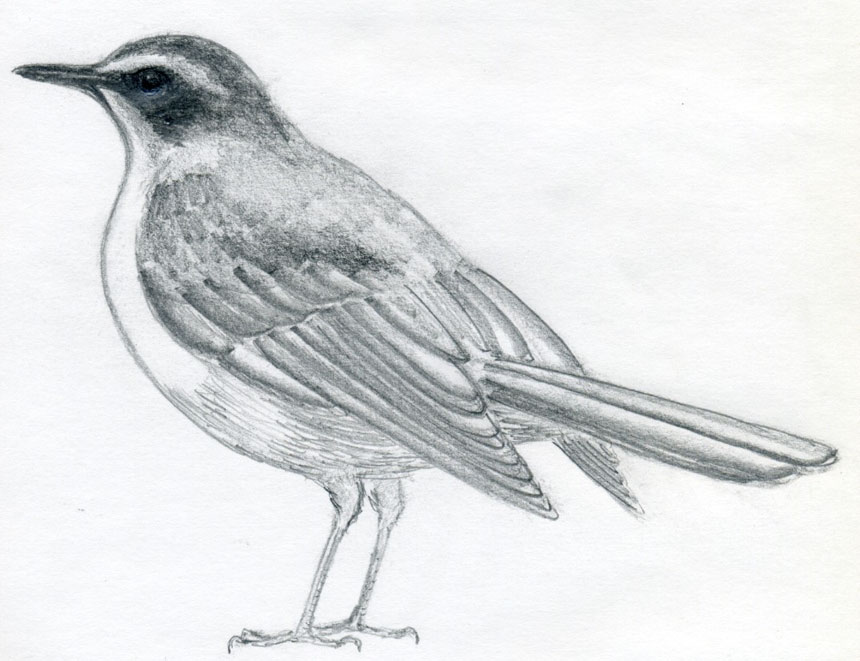 click the image to enlarge Bird’s tail serves as a supporter when sitting and it often moves up and down depending on the bird’s position. The tail consists of several long feathers assembled into a fan-like shape and it actually looks like feathers piled up on each other. click the image to enlarge Erase the rest of all unnecessary initial pencil lines and you have a beautiful picture to add to your collection of bird drawings. |
Let’s Learn How To Draw
A Bird Kingfisher
click the image to enlarge
You may be wondering why I have chosen Kingfisher. Simple; I like Kingfisher.
It’s a lovely and clever small creature and you may be lucky if you spot some in wilderness.
Besides that, Kingfisher is also an excellent and easy exercise of how to draw a bird.
click the image to enlarge
Before you make the first pencil strokes, try to divide the body into smaller sections. Both the head and the trunk are ellipses. You can also notice that the back curve continues directly to the beak.
It is – of course – an imaginary line, but it helps a lot to create balance and capture the best proportions.
When you draw a bird you need to seriously capture 2 basic body volumes as accurate as possible in the beginning.
Those are the head and the trunk.
click the image to enlarge
From now on you can begin to refine the detail drawings.Observe how each part on the body is of different color.
Divide these areas. Outline the eye. Please make a special attention when you draw the eye. Notice how close the eye actually is to the beak. It almost touches it. Almost every bird has the eye very close to the beak. But when we draw birds out of our heads (without seeing one) we tend to draw the eye in the middle of the head and wondering why this bird looks so unnatural. You’ve just discovered a drawing technique trick of knowing how to draw a bird. 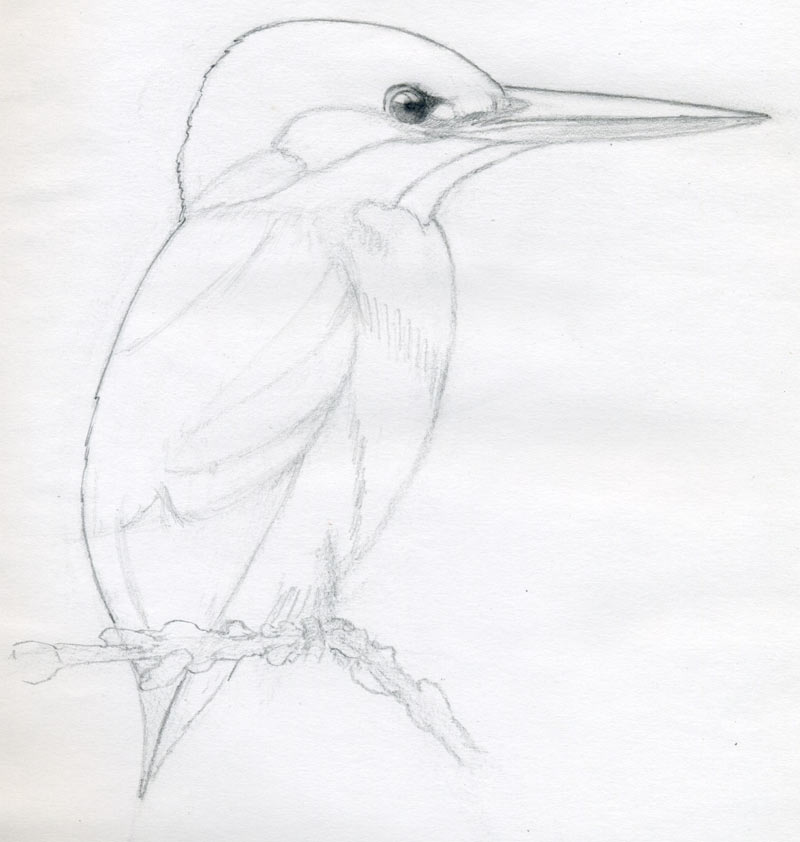 click the image to enlarge Draw the eye. Draw it in details if possible.If you’ll have the eyes ready, suddenly the bird will start being more alive than only a drawing. Work out the beak as best as you can. Kingfisher has rather huge beak comparing to the bird’s body. Such beak needs a little detailed “make up”.  click the image to enlarge By very gentle pencil touch, outline the feathers on the wings and on the back.These weak lines will serve you as important guidelines when you draw a bird in color (pencils or other medium). Make sure you have the eye done right. Notice that the eye is darkest in the middle. There are two small light reflection spots on the upper side of the eye. Draw them, I mean use your pencil-shaped eraser or kneaded eraser and make those highlight spots there. Those light spots will make the bird look very realistic. 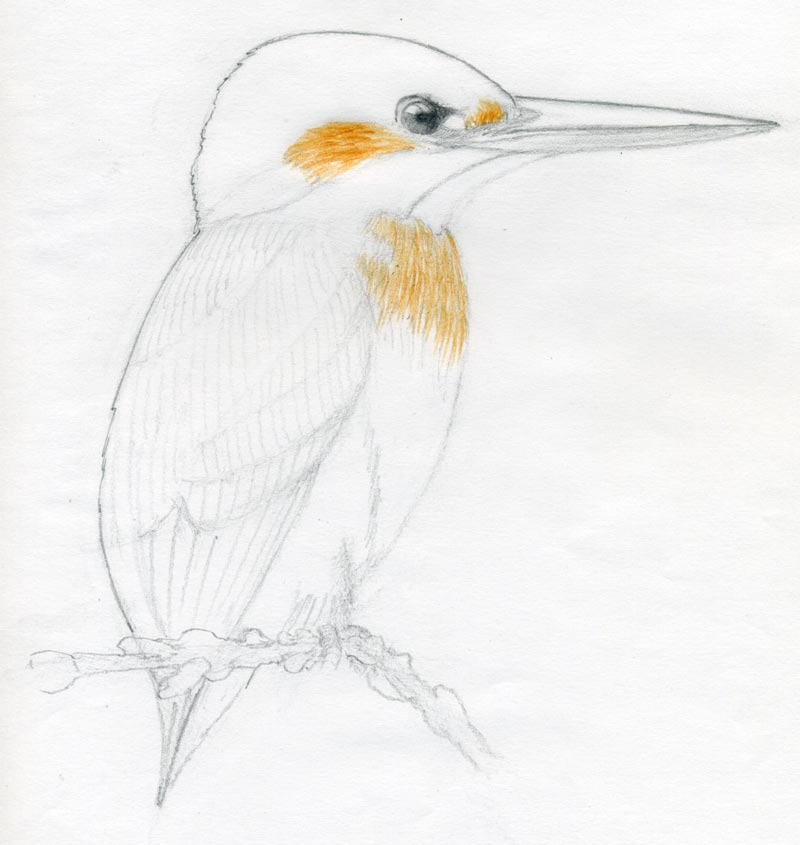 click the image to enlarge Now you can begin to put color. The reason I started with orange colored body parts is that those are the easiest to color.Blue colored feathers need a little detailed work. So work out the orange color first. Notice that the feathers on the bird’s belly are made by single pencil strokes of different intensity. Some parts are darker orange and some are very light. 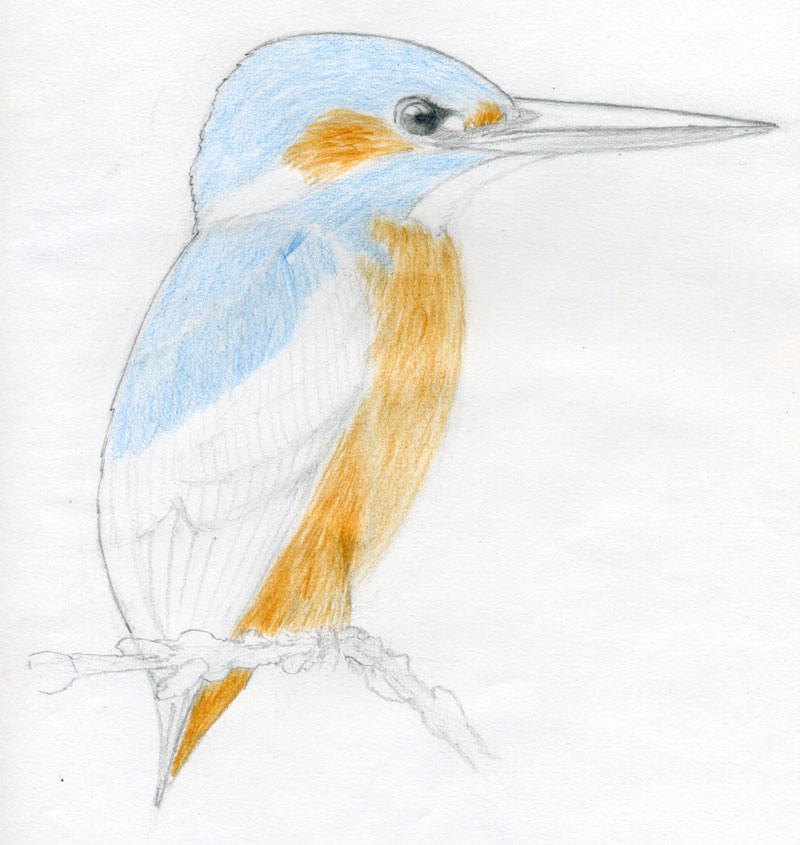 click the image to enlarge When you have the orange part almost ready, you can begin to put color on the blue parts.I would recommend coloring all in the same intensity without pushing the pencil. Just blunt light blue color. Mind however, that you make the pencil strokes in the same direction as the feathers – simultaneously. That will create a natural realistic look. 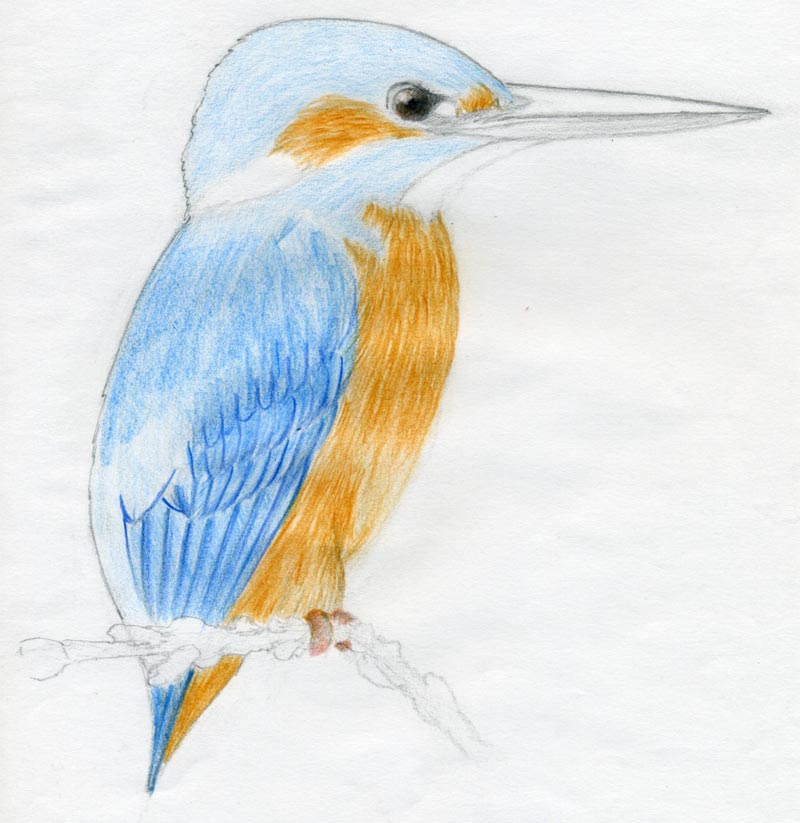 click the image to enlarge Although I am teaching you here of how to draw a bird, I am also a human, making mistakes; so I want to show you what I just did. I was “too much in a hurry” and made too strong wing feather contour outlines. Originally I didn’t want to let you see this mistake but since we all can learn from this I want to show it to you…not to make the same “quick step”.  click the image to enlarge Here I erased and softened these feather outlines. Now they are acceptable but we shall work them out later.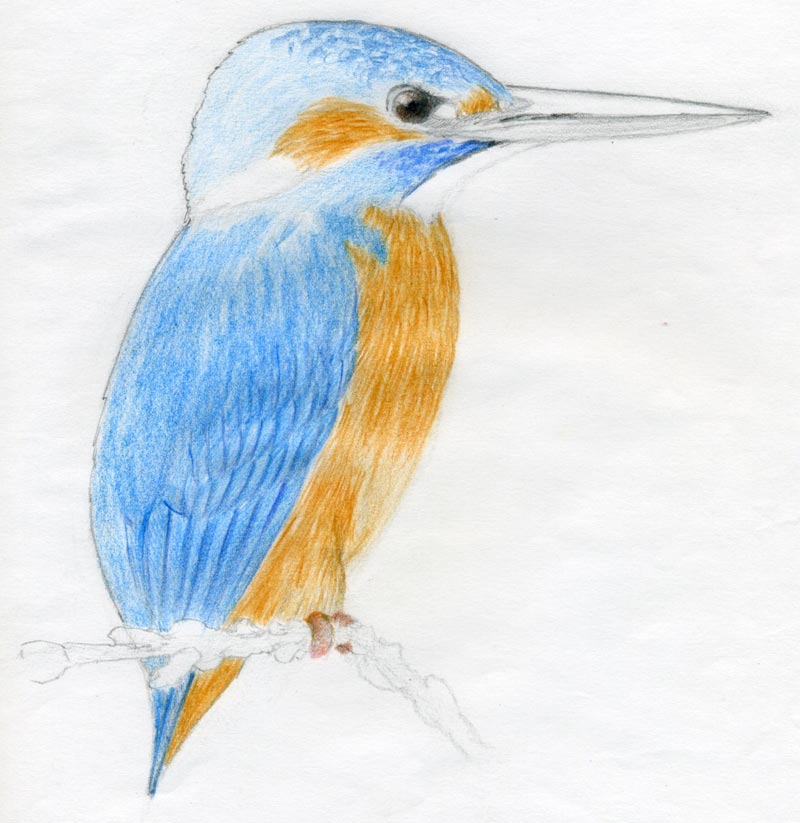 click the image to enlarge Here comes a little difficult part. But only a little. The feathers on the bird’s head and the neck (collar). They are combined with darker spots. These spots are an effect of layers of the feathers. 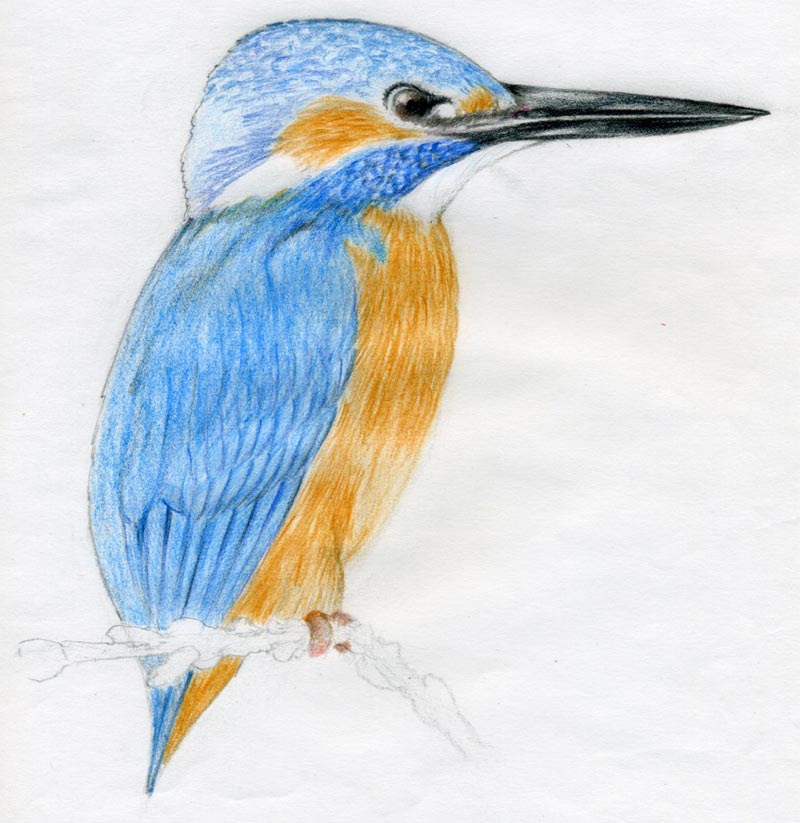 click the image to enlarge In the first paragraphs I mentioned that to learn how to draw a bird you need to master how to capture two basic body parts; the head and the trunk.When you draw Kingfisher, the beak is very distinctive and needs a special attention in order not to destroy the drawing you’ve just made. I used two color pencils to create the best possible look of the beak. Combine these two color pencils on a separate paper first. Leave the bright line in the middle of the beak and try to make the shades on the beak looking as natural as possible. 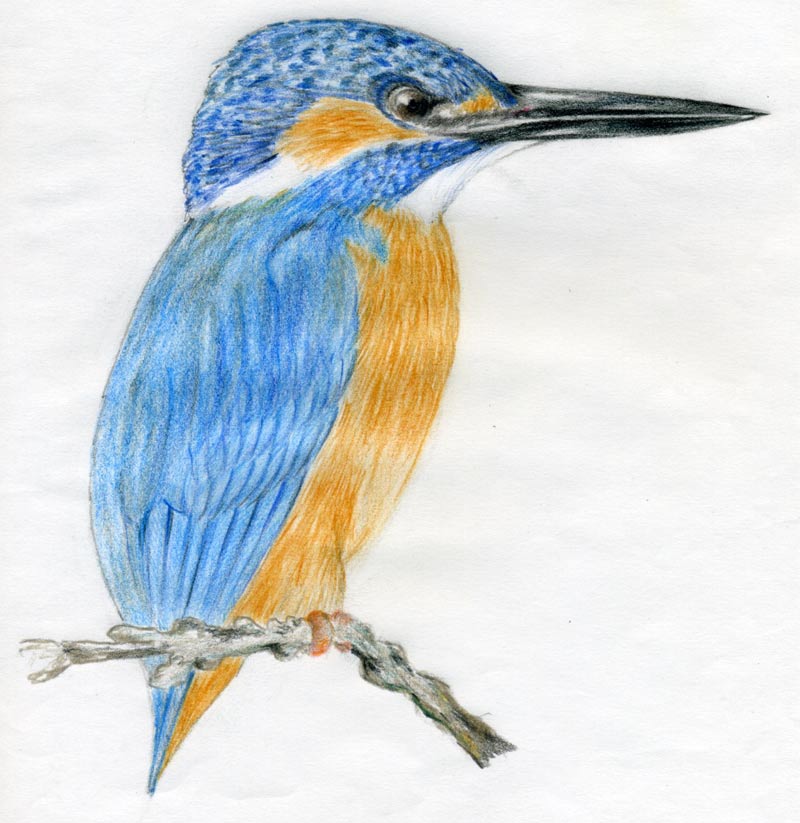 click the image to enlarge Gradually continue to put darker blue on all blue parts where necessary.On the back, you can occasionally use also orange. Be very careful with orange color on the blue parts because you’ll easily get an unwanted green. The green color actually is there, but very weak. Almost insignificant. click the image to enlarge It is better if you add a good background color when you draw a bird. The background color should come as the last – if you draw on white paper.Good idea is to draw on colored paper from the beginning. Kingfisher’s natural environment is water with greenery. I put this moss green background so that the white part on the throat will also be visible better. |
