


o draw Carnation can be a very easy job. Carnation is one of the simplest flowers to draw.
I made a couple of simple steps that you can easily follow and learn.
If any flower looks too complicated to you, or it may just look too complex it is good idea if you break it into smaller parts, like flower’s head, calyx, stem(s), leaves etc.
When you do that, it will instantly look easier.
It just won’t feel like overwhelming and complex work to do
Do You Love Drawing Flowers?
The head of Carnation flower resembles to a mushroom. Draw two intersecting ellipses, vertical and horizontal, just like you see on the illustration. The vertical ellipse represents the calyx and the horizontal represents the opened flower with petals. So, you have now a rough basic outline.
Click On The Images To Enlarge
 These two ellipses will serve you as guides to keep the correct proportions if you cannot draw Carnation yet without them. Just play with it a bit. Now draw the calyx and the petals into these ellipses and gradually erase the help-lines as needed.
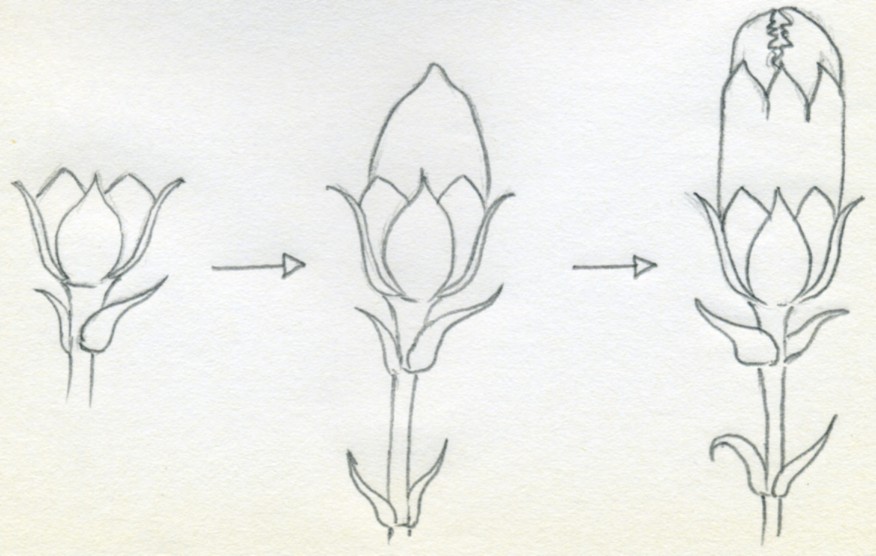
Let’s break the flower into smaller parts and practice drawing Carnation “per-partes”, beginning the drawing from calyx and flower bud first. I think, these illustrations are simple and clear enough so that you can follow through.
Just try to imagine how the Carnation would grow from bud to a full bloom flower. Yes, it is that easy.
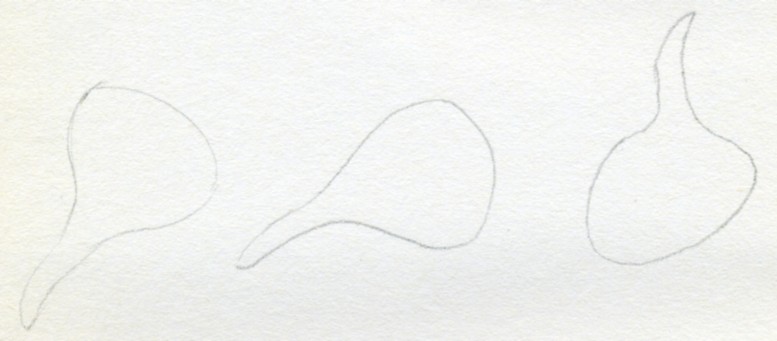
Petals are really simple if you draw them separately each, aren’t they? Just draw each petal as described on the picture.
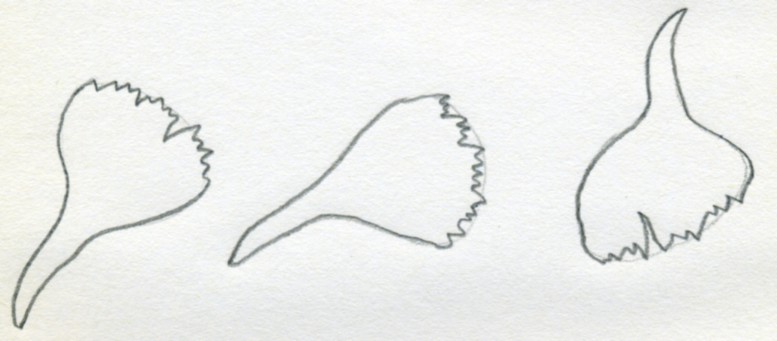 Add the jaggy edges and the petals are ready. Easy isn’t it? OK, let’s put these petals into the calyx and make a fresh looking Carnation. Take a look one more time at the bud drawing, observe it a bit and then add the petals on the top.
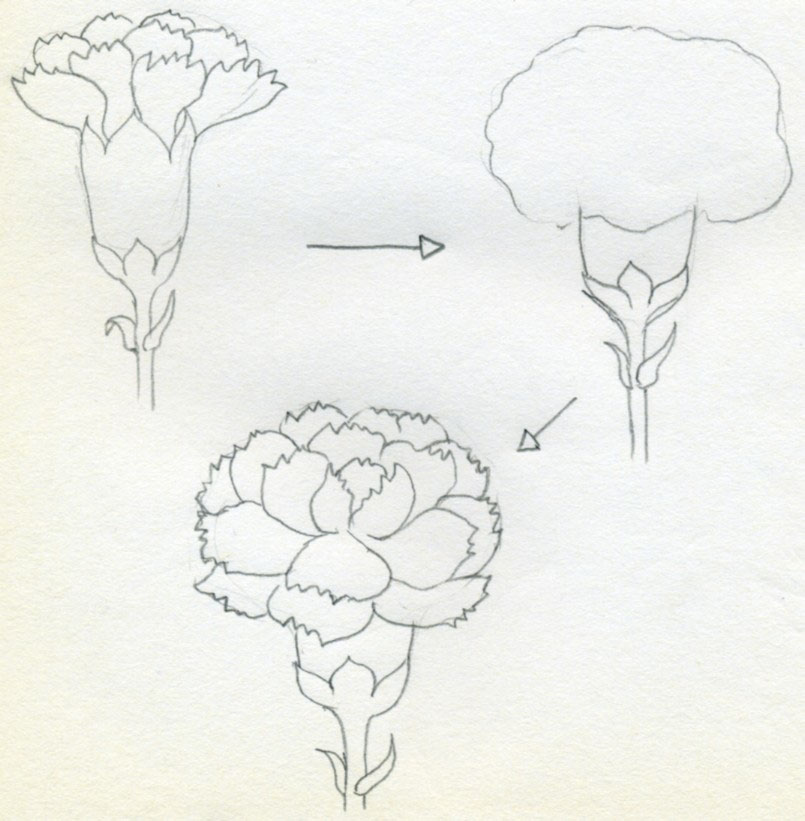
If you would like to draw Carnation that is in full bloom, simply widen the head (petals) as you see on the illustration.
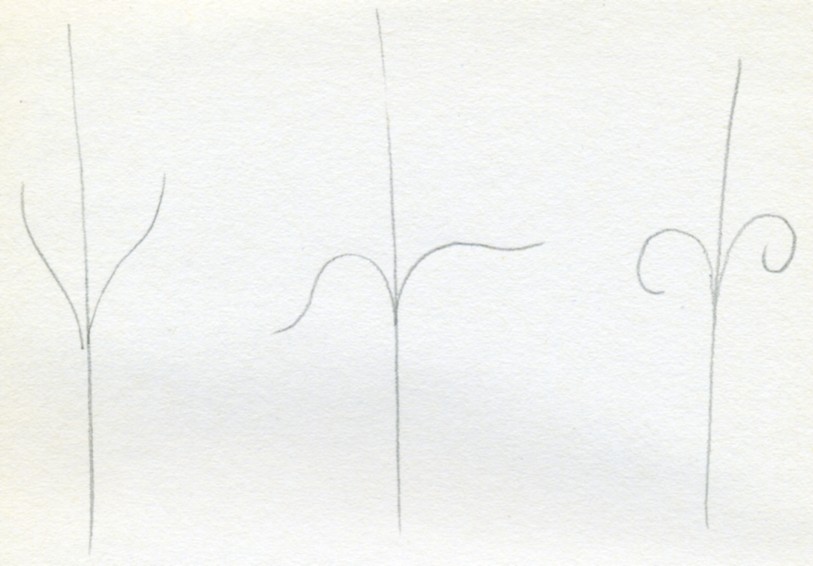 To make the flower complete, we need to add the stem with leaves. Carnation stems and leaves are very easy to draw. The stem is just a kind of simple “stick”, and the leaves look like long curved arrows. Practice first the various shapes of the leaves according to the illustration. You will soon understand their shape. These are the basic variations of Carnation leaf shapes. Sure, there are many more, as every flower is individual but if you learn these you will easily draw any other.
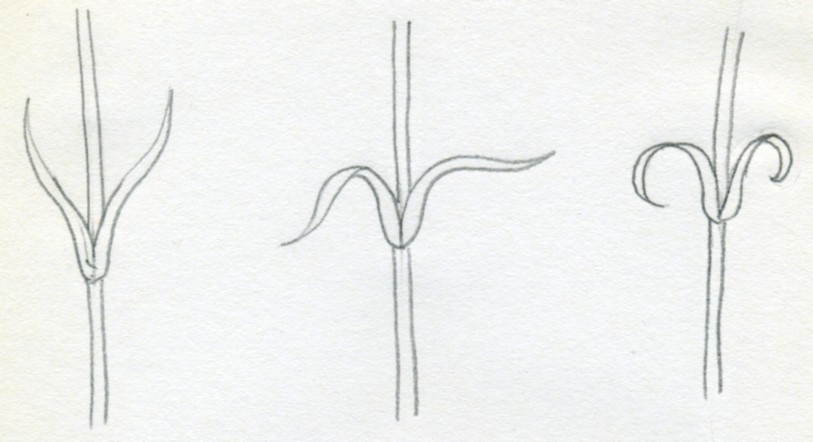 If you have some fresh Carnation available before you, you can see and practice right now. Draw directly into these simple lines the actual 3dimensinal shape as you see on the illustrations. Erase the help-lines as needed.
 A couple of split stems examples. Notice that the “knee” where the stem splits always has leaves.
Click On The Images To Enlarge
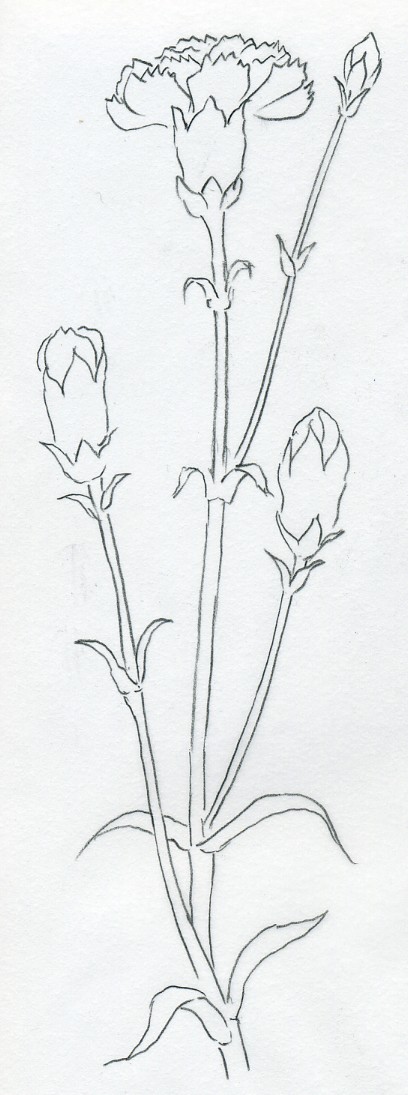
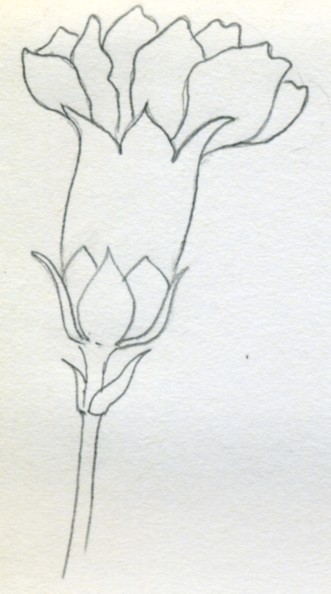
I think it is time to recap what you have learned about Carnation parts so far and compose – draw Carnation as a complete flower. If possible try to draw it a little more complex, as you see on the illustration. You have practiced enough how to draw individual flower parts so consider this as a kind of assignment.
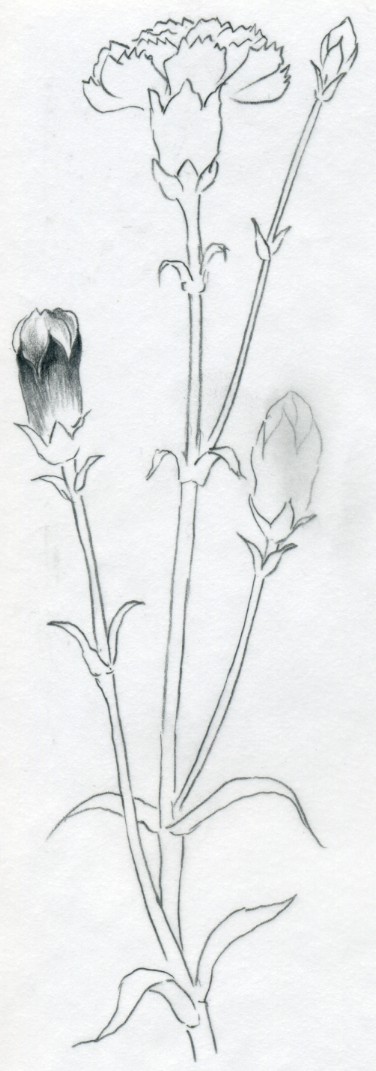 Make as many mistakes as possible. It is good to make mistakes in the beginning. That is the process of learning, especially when you learn to draw. Remember you are not a camera, you are human and every line you create is good because it carries your individuality. We are still on half way and the only work you have completed is the outline of the flower.
In order to make this Carnation outline drawing complete, let’s put some life into it. Let’s dress the Carnation up. It will be only by pencil but you will see how entirely different is the final impression. You can draw directly by colored pencil too if you wish.
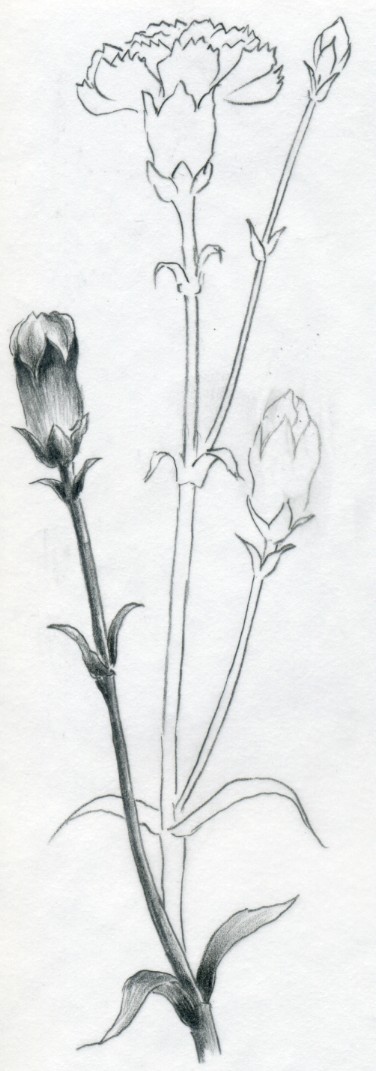 Begin from the head or bud of the flower if possible. By completing the head of the flower first you instantly give individuality to the flower. I think that is quite obvious. It is similar to drawing any living creatures like animals, humans or flowers.
  All of them have a part of the body that defines the character and individuality of the person, animal or plant. You would certainly not draw details of flower from the root stem, as you would not start to draw work out the details of a human figure from the legs.
Imagine how would that be, to draw Carnation in color. Imagine you have only black and white vision. Certainly, the green parts will be of darker tone and the petals of the flower would be lighter. Let’s assume that the petals are light pink or red color.
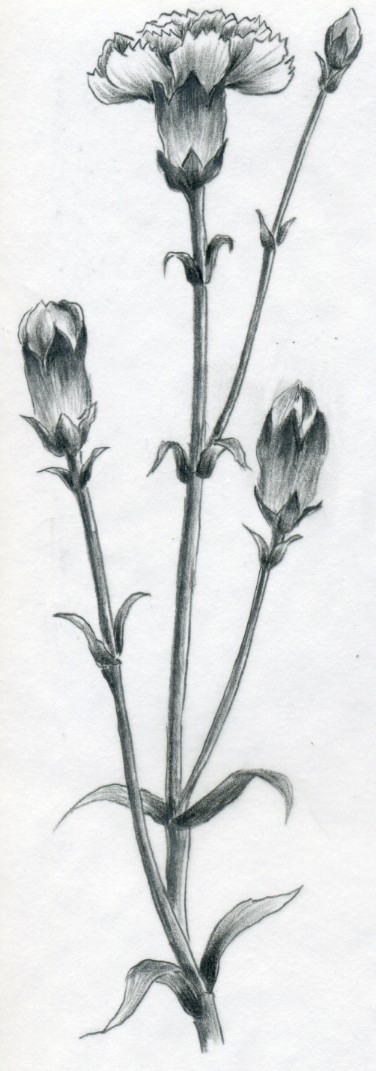 This picture has 3 buds and one opened flower. Let’s begin from the far left bud first. Shade the calyx by light strokes and add more dark tone contrast where you think would be necessary. If you draw Carnation and you have a real Carnation flower you can refer to the details directly - live. You can see that one side - one half of the stem is lighter.
It creates an image of 3-dimensionality, which is important. On flower head gently shade the petals by same strokes as you see on the picture. Click on the images and they will open in new tab or window enlarged so that you can see the details, the pencil strokes. Notice the spot where the leaves are growing, it is dark and it gets lighter towards the end of the leaves.
.
