


There are so many kinds of hibiscus flowers that I could not decide which one to draw for you at first. To choose red or yellow or white…?
My guess is that hibiscus would almost always mean red color.
I thought this hibiscus would be a great model for the drawing exercise in the beginning.
Once you’ve learned to draw this one you will be able to draw any kind of hibiscus of your choice, in any position or angle.
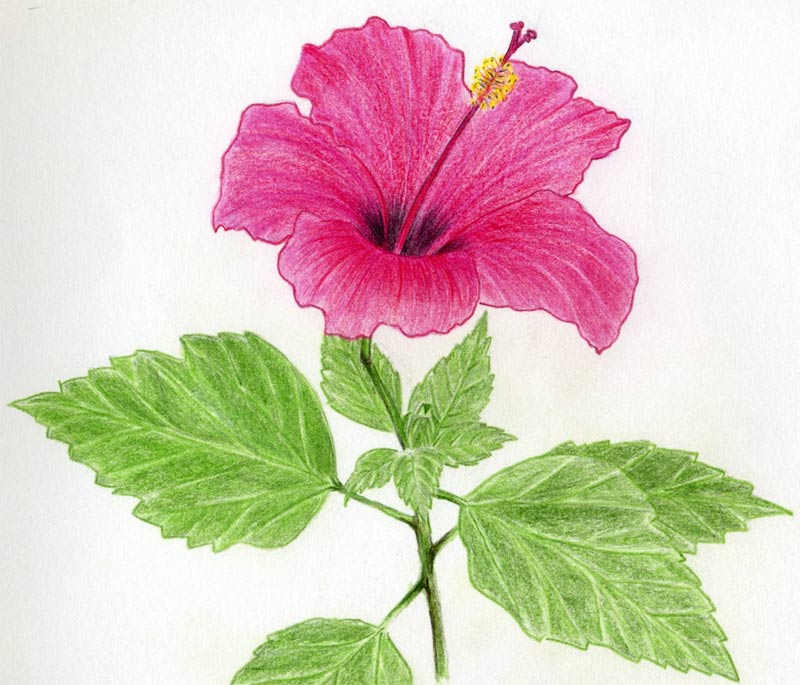
When you finish your hibiscus flower drawing it should look something like this picture above or better.
click the image to enlarge
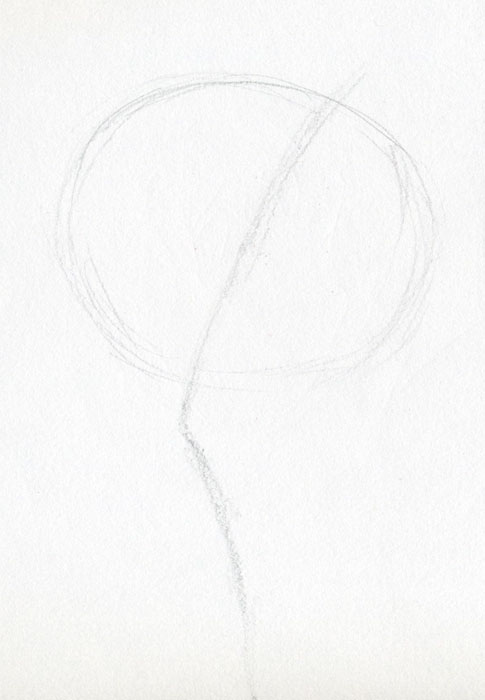
Decide the size of the flower. Any size is OK if it fits on the paper.
Sketch an approximate circle. Sketch the stamen starting on the top continuing downward to the flower stem.
This will be the basic position. The drawing angle.
click the image to enlarge
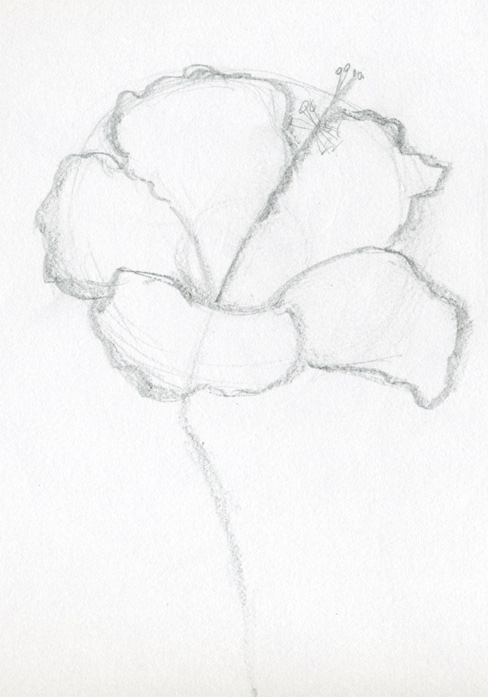
I am sure you know that hibiscus flowers have five petals. So, here you go, sketch (approximately) the five petals.
Notice that the stamen in the middle represents a borderline between two petals on the far side.
For better imagination, you can look at the flower like this:
and Now you can sketch and draw the petals easier and quicker I think. 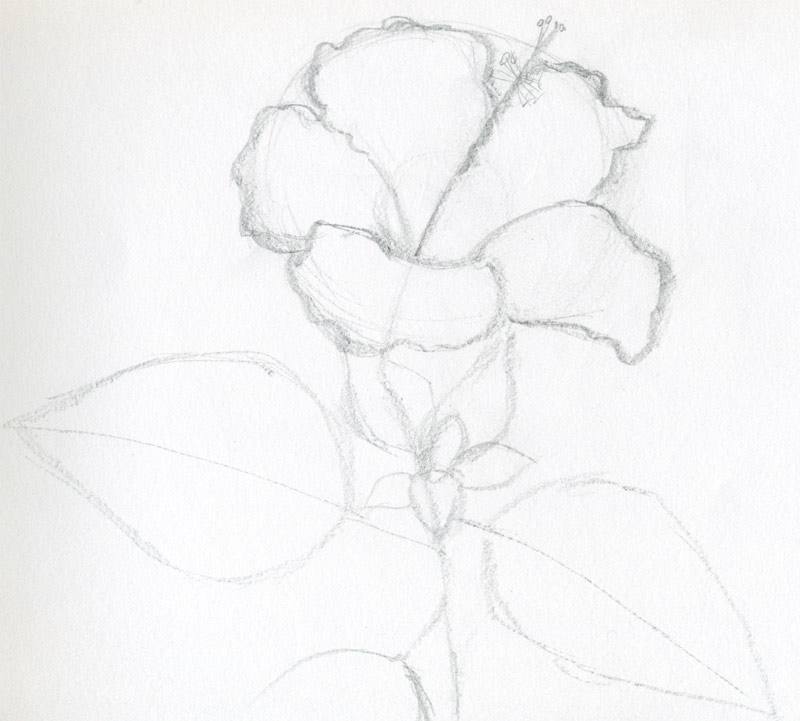
click the image to enlarge
Outline now the contours of the leaves. Leaves of Hibiscus flowers very much resemble to the leaves of roses.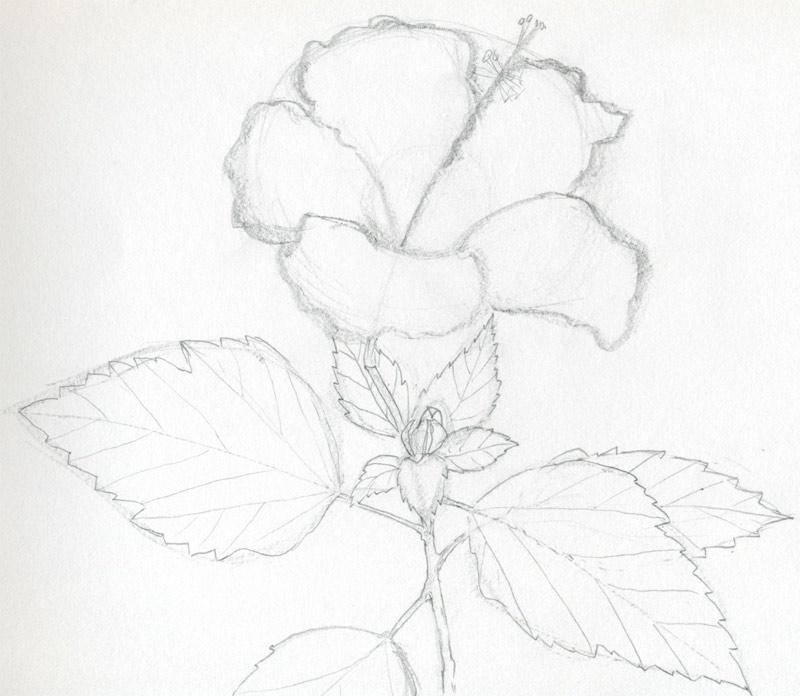
click the image to enlarge
Marking out the veins on the leaves makes them instantly look more alive. Can you see it? 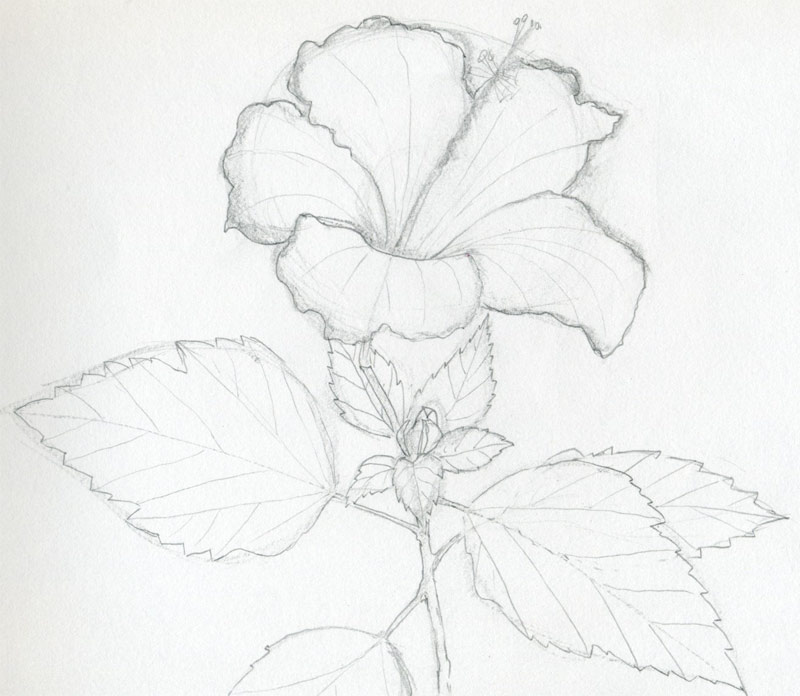
click the image to enlarge
Here comes the important part: the veins on the petals. See how the veins on petals always follow the direction of growth of the petals. 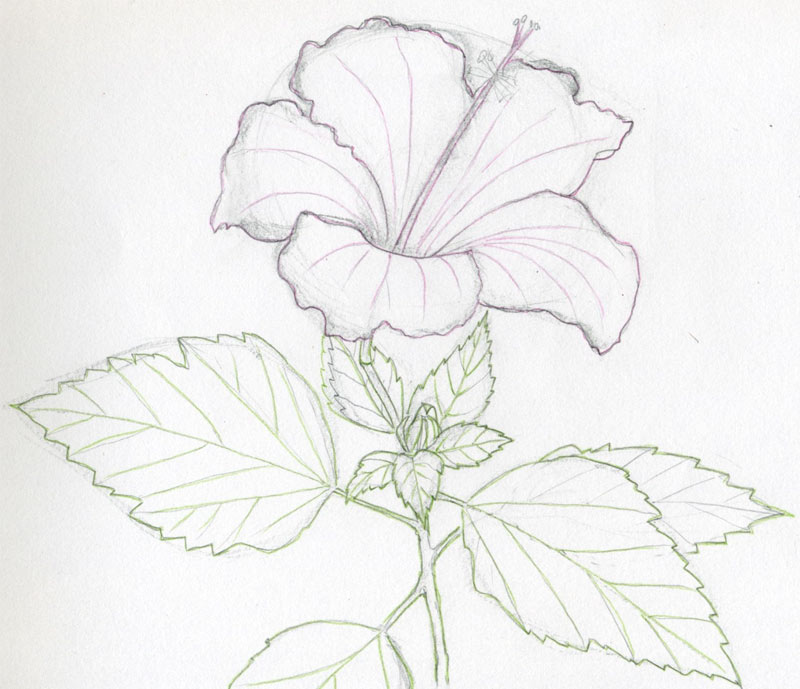
click the image to enlarge
|
From here we shall change the drawing medium from graphite pencil to color pencils.
You will need two color pencils now.
pink color
and
light green color
Using the pink color pencil, draw a continuous outline contour on petals over the initial graphite sketch. Do the similar on the leaves.
You will soon see that it is best to draw hibiscus flowers in color, instead of just by graphite pencil.

click the image to enlarge
Erase all residual graphite lines.
Only pink contours of the petals and green contours of the leaves should remain visible now.
Coloring work starts from here. I think you are going to love it.
click the image to enlarge
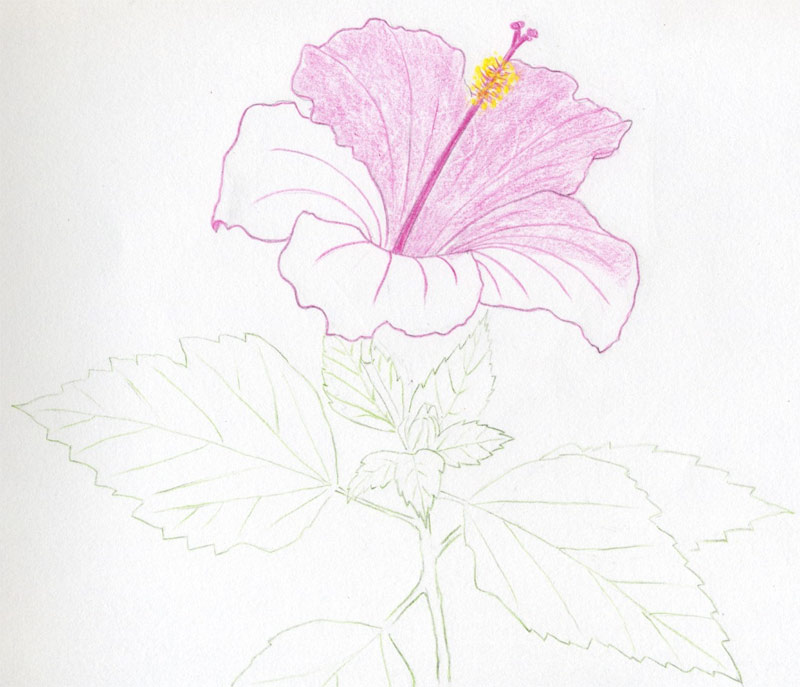
Color the yellow anthers first. First, because it will be difficult to draw yellow color over the pink background later.
Mark out the veins on petals by slightly stronger pink color pencil lines. Push your pencil very gently.
Now you can begin to color the petals in pink. All petals in the same color tone. No shading yet.
If you draw red hibiscus flowers, it is very convenient to draw a pink color basic layer first.
click the image to enlarge
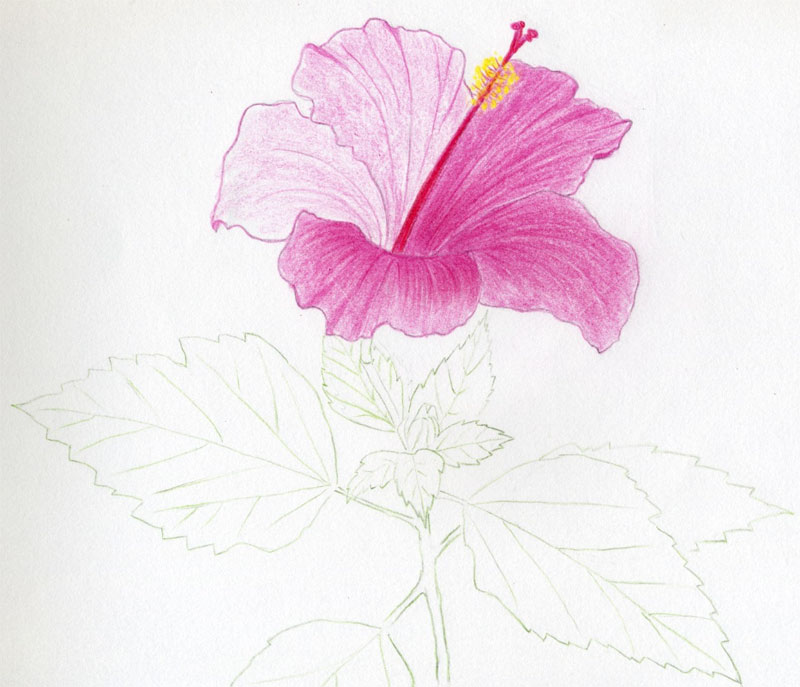
Here you can begin to add more pink color tone and draw the hibiscus petals darker.
While coloring the petals (or leaves), always make the pencil strokes running parallel with the veins.
While putting more color on the petals, the initial vein lines may disappear so it is good if you occasionally accentuate them.
click the image to enlarge
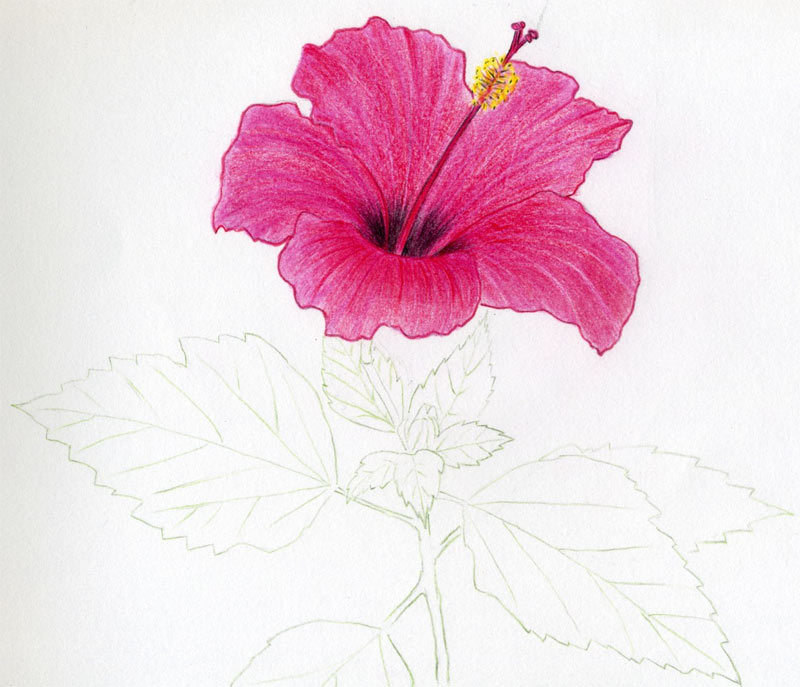
Finish shading the petals. The color tone inside the chalice is almost always darker.
Actually one part inside the chalice have a significant blackish tone.
Darken that part by dark green pencil. If you do not have dark green do it by black.
This one single spot is very sensitive so I would suggest to make a test on a separate paper first.
click the image to enlarge
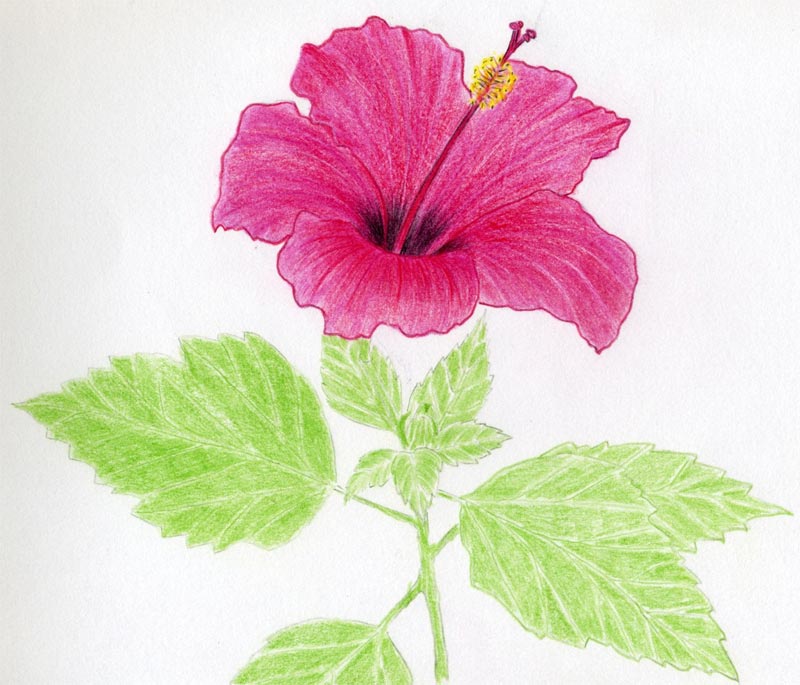
It is time to color the leaves in green. Color all leaves by light green color pencil leaving the veins brighter, almost white.
This initial green color tone is the same on all leaves. It is the basic layer.
click the image to enlarge
Add more dark green color on the leaves. Be careful about the veins, they should remain brighter.
