


So you want to know how to draw a heart? To be honest I felt a bit
confused when I began work out this theme. Fortunately I got a great
idea that I want to share with you.
I thought that everybody intuitively knows that drawing a heart is not a big deal.
Simply, drawing a heart by two simple pencil lines would look very lonely.
Don’t you think so?
Instead of just drawing a heart, I am going to show you how to draw it an unusual way.
People will be amazed when they see your work.
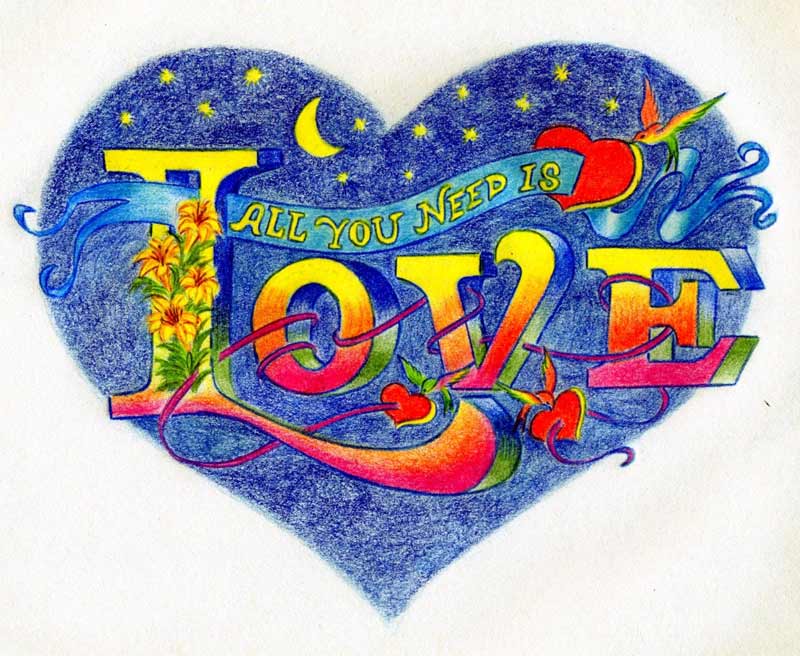
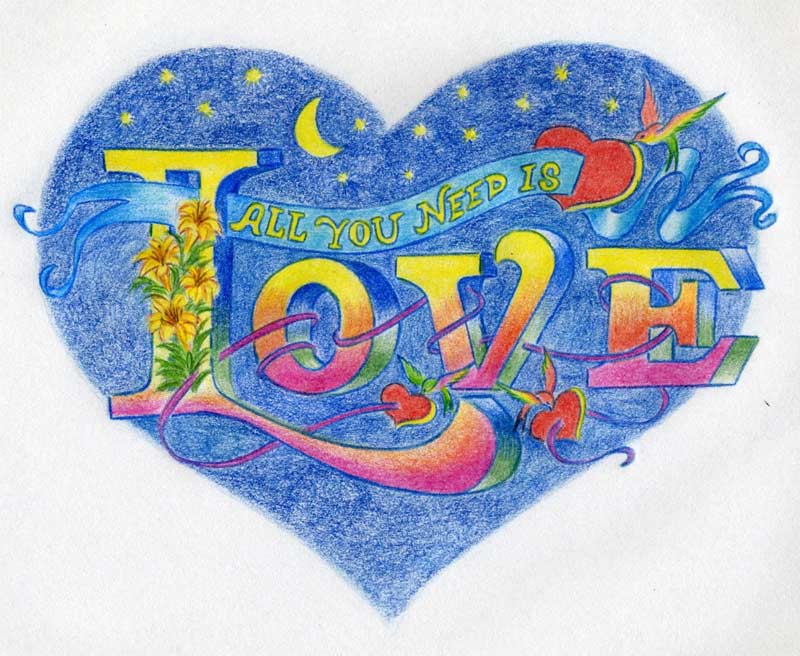
This
is the idea that came across my mind. I found this picture in my
Beatles Illustrated Lyrics book published by Alan Aldridge. The idea is
fabulous.
I made this drawing in colored pencils. Misty image of colors is
adequate to that. It would be more appropriate to draw a heart in bigger
scale and make it with acrylic colors.
click the image to enlarge
This picture belongs to “big hits” that came out in late sixties during the peak of Hippie era.
It is actually an illustration to The Beatles song: All You Need IS Love.
I love this illustration very much and I hope you’ll love it too.
click the image to enlarge
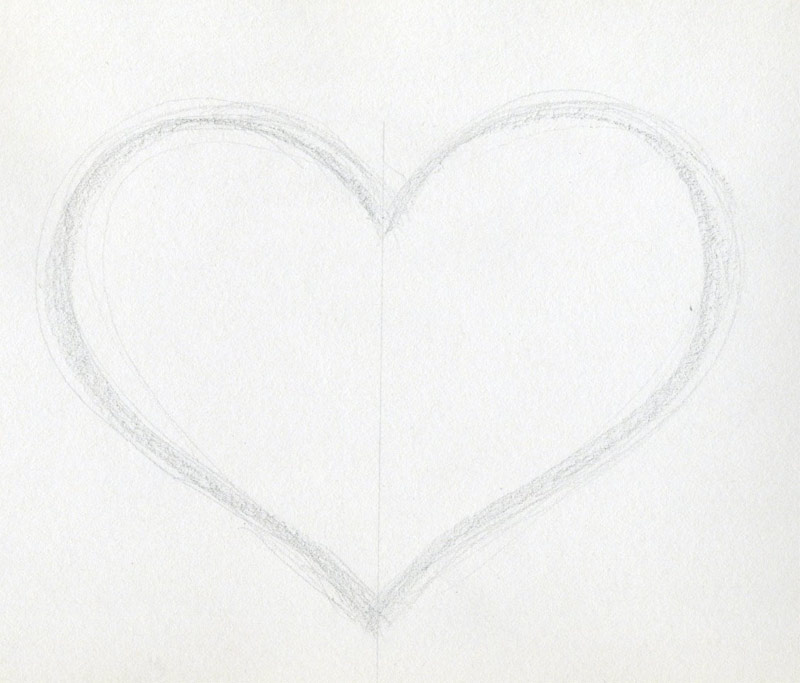
Beginning is simple. Draw a heart. Simple isn’t it? Make as many lines as you feel necessary.
click the image to enlarge
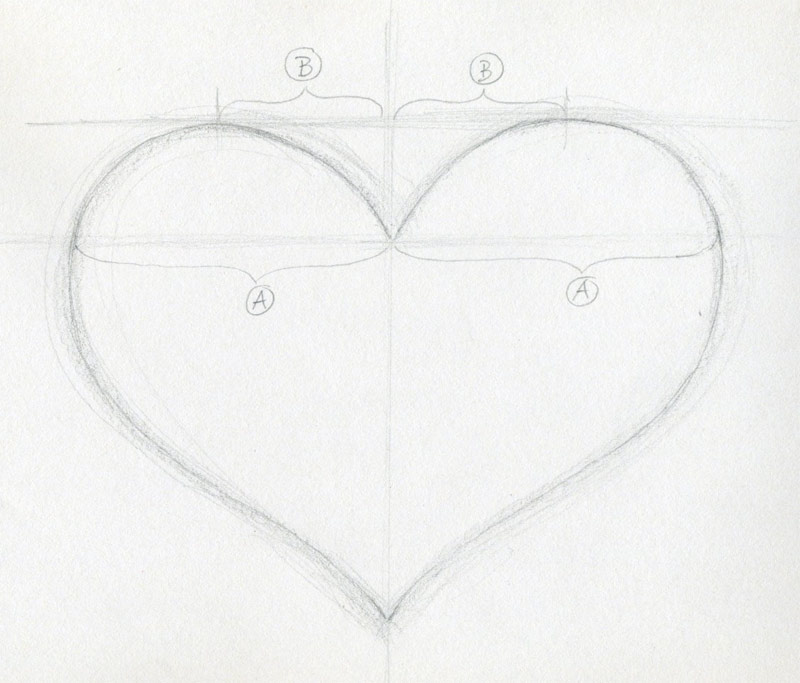
If you struggle to draw both sides of a heart to make it even and same, this may help:
|
You can make guidelines (without ruler!) as seen on the picture. The distances A - A are the same. Also the B - B are the same. When you are done, you now know how to draw a heart, if this is what you wanted to learn. However I believe that you will stay with me here and continue to work this out till the end. 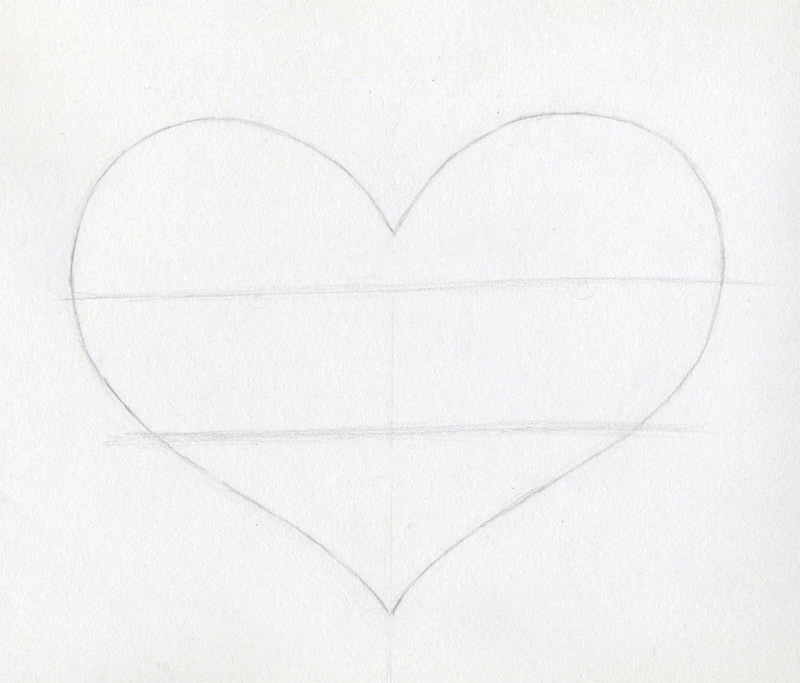
click the image to enlarge
Next, you have to decide the size of the letters Love. Draw two guidelines. See, my guidelines aren’t straight but I correct but it will go on unrecognized. It sometimes work this way. 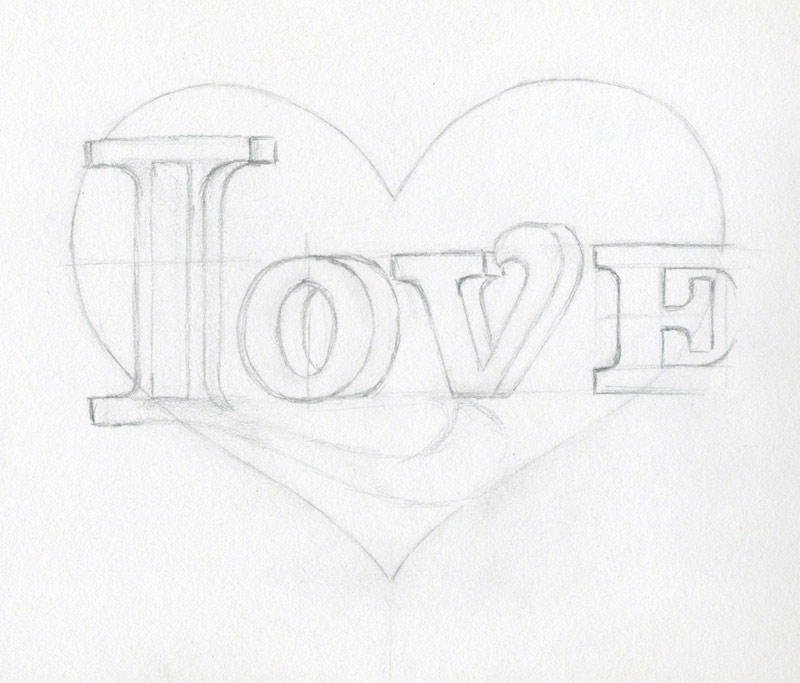
click the image to enlarge
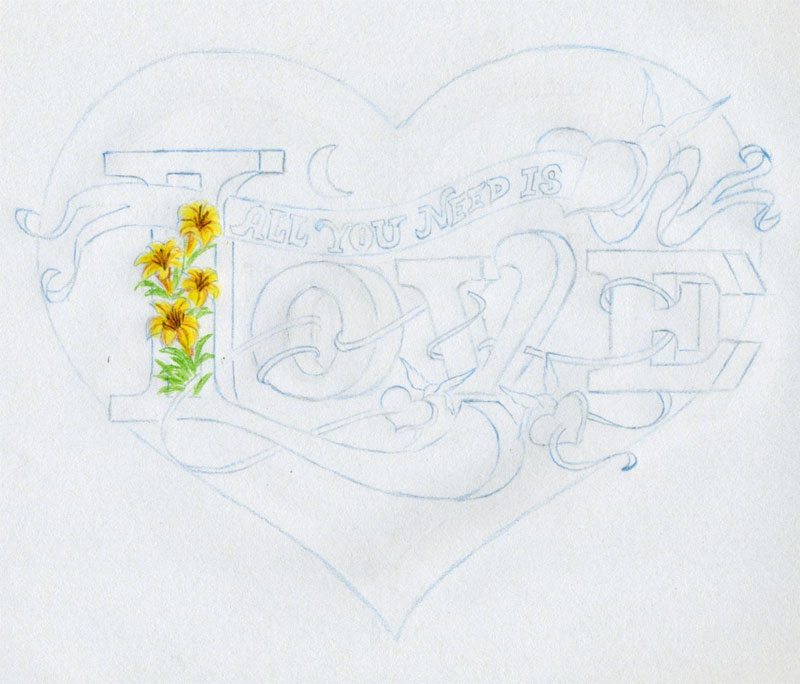
The word Love consists of four letters. Divide the space within the heart contours and sketch the letters.You can create your own original letters if you want. 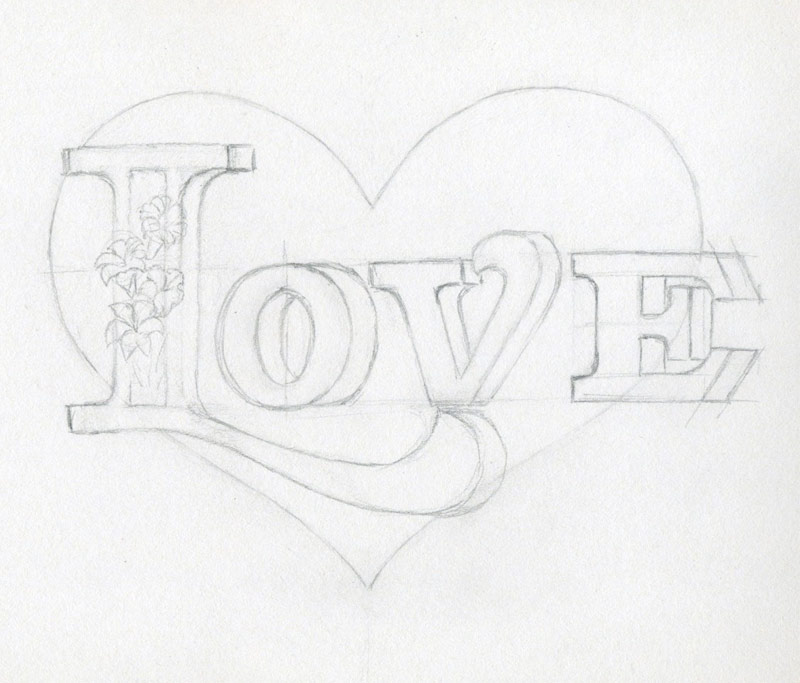
click the image to enlarge
The first letter is capital L with a prolonged leg. It is decorated with yellow lilies.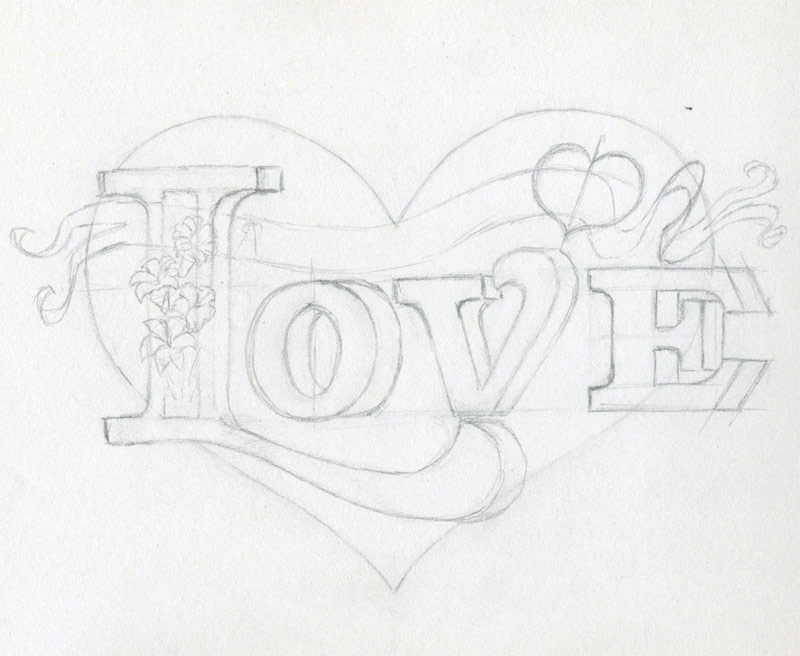
click the image to enlarge
Draw
the ribbon floating above the letters. Ribbon carries a mini heart on
its opposite end. This mini size heart is also good exercise of how to
draw a heart.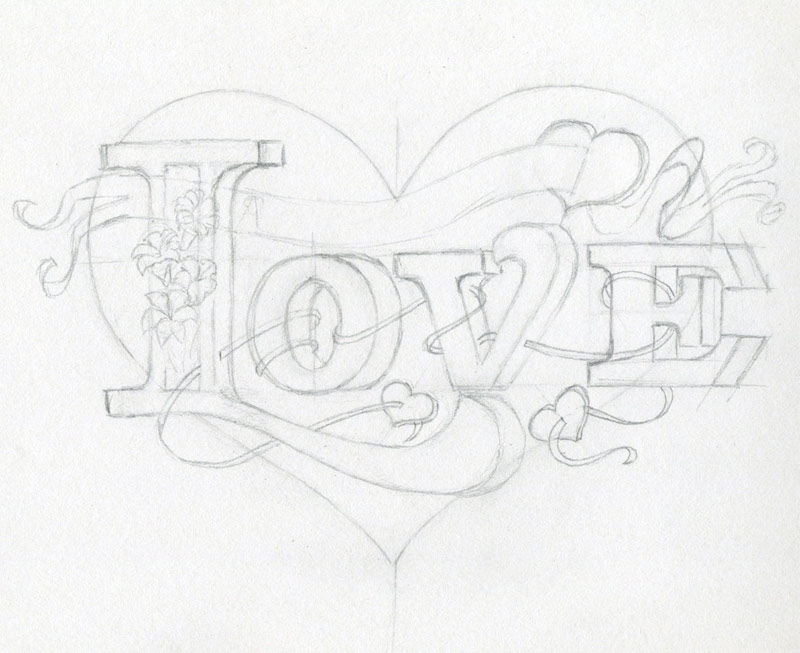
click the image to enlarge
|
Now, sketch the thin ribbon running through the letters. Both ends of
this thin ribbon are decorated with another two mini hearts.
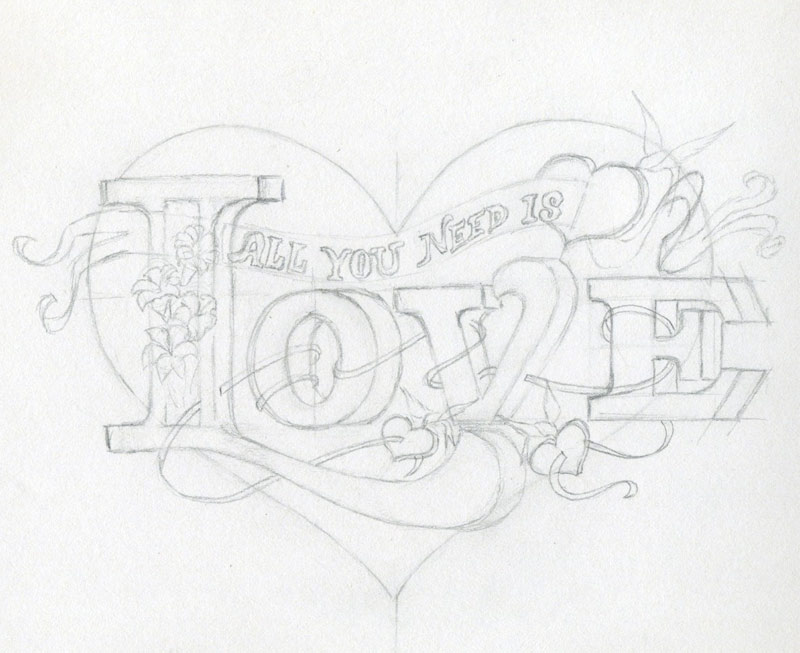
click the image to enlarge
In order to fit the All You Need Is into the wide ribbon above, it is good if you sketch first the letters in weak single pencil lines.
All
three mini hearts are carried by birds. These birds are also miniatures
and you can draw them very easily. Enlarge the picture and I think
you’ll get the clue.
To draw a bird is really easy and to draw these small miniature birds is even easier.
click the image to enlarge
This is one good example of how can you adjust the size during the drawing if applicable.
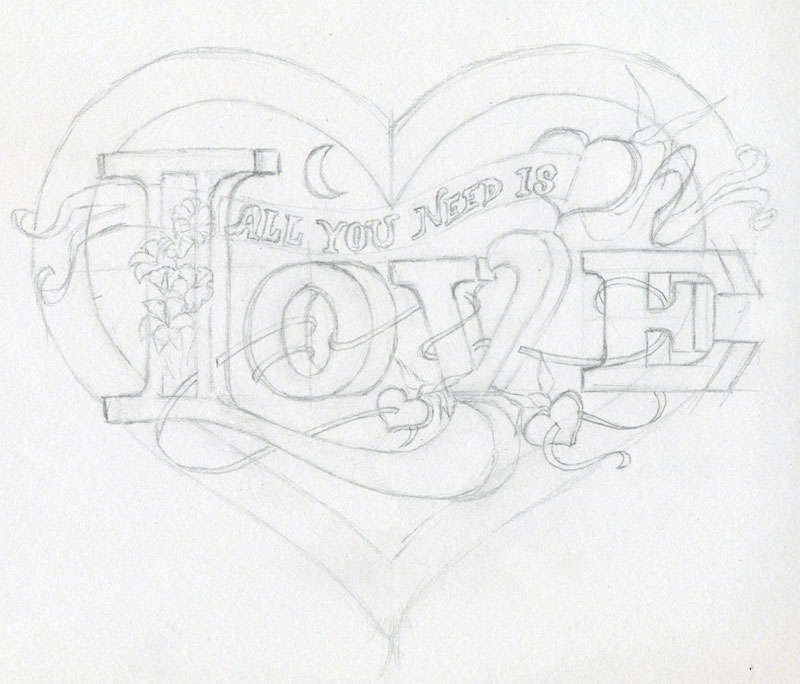
I
found the initial size of this heart a bit small when all decorative
sketches were done. So I decided to extend the volume of the original
heart.
You can resize your drawing as you like using this simple
technique. This technique is easy to use when you draw a heart or any
object that has evenly shaped contours.

click the image to enlarge
We were working with a standard graphite HB pencil so far.
Graphite
pencil always makes the paper a bit dirty and grayish. This picture is a
bit complex and too colorful to work with graphite pencil till the end.
Standard
pencil is helpful in initial sketching but it can be an obstacle when
you are finishing your drawing, especially if it is rich in colors and
patterns.
Draw blue pencil lines over every contour line. Not very
weak and do not push the blue pencil either because you will erase it
later.
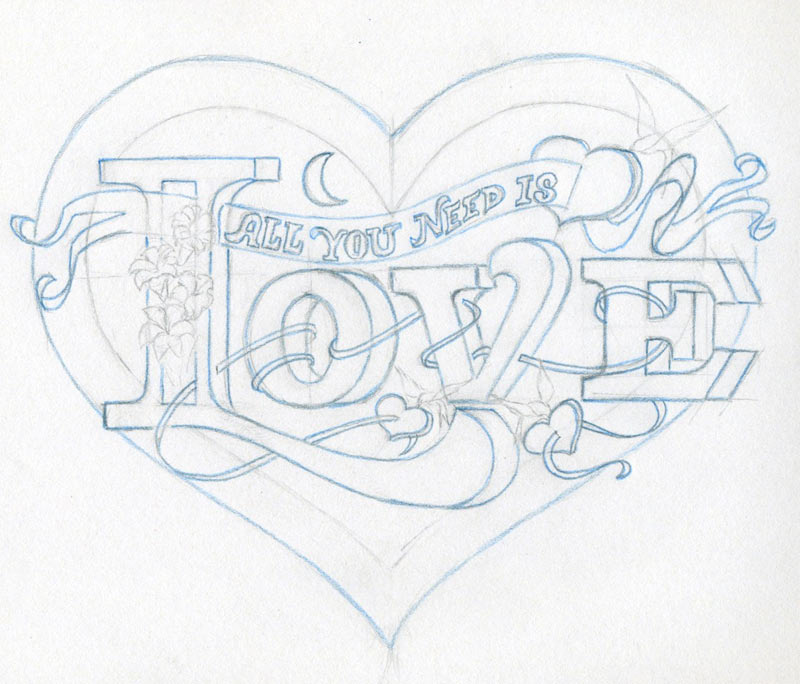
click the image to enlarge
Your drawing with blue pencil over the initial lines should look similar to this picture.
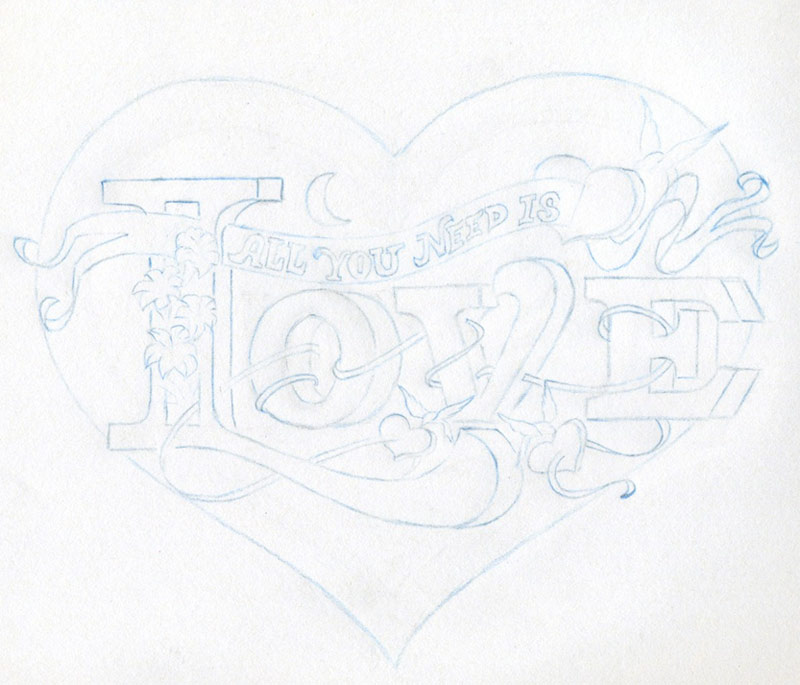
click the image to enlarge
Make sure you outlined all contours with blue pencil. If yes, use plastic non abrasive eraser to erase all the initial graphite pencil lines.
You will get a cleaner space free from graphite pencil lines cluster
click the image to enlarge
Draw a heart and fill it up with color pencils is the coming joyous task. It is difficult to say where to start.
I
would say begin from the lighter and brighter colors. Later you can
develop your own way as you’ll understand how colors are changing when
blended together.
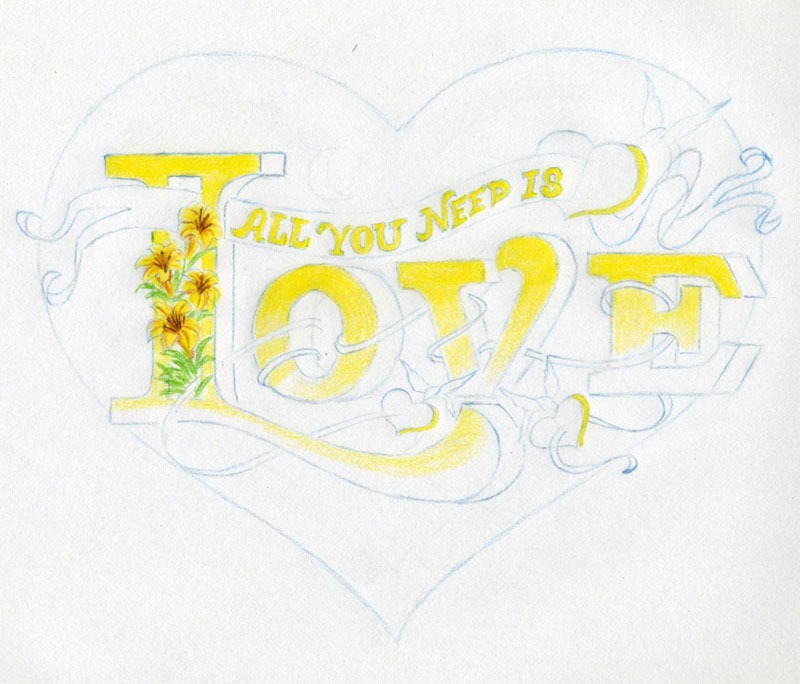
click the image to enlarge
After coloring the lilies inside the L capital letter, I gradually colored all the yellow parts.
click the image to enlarge
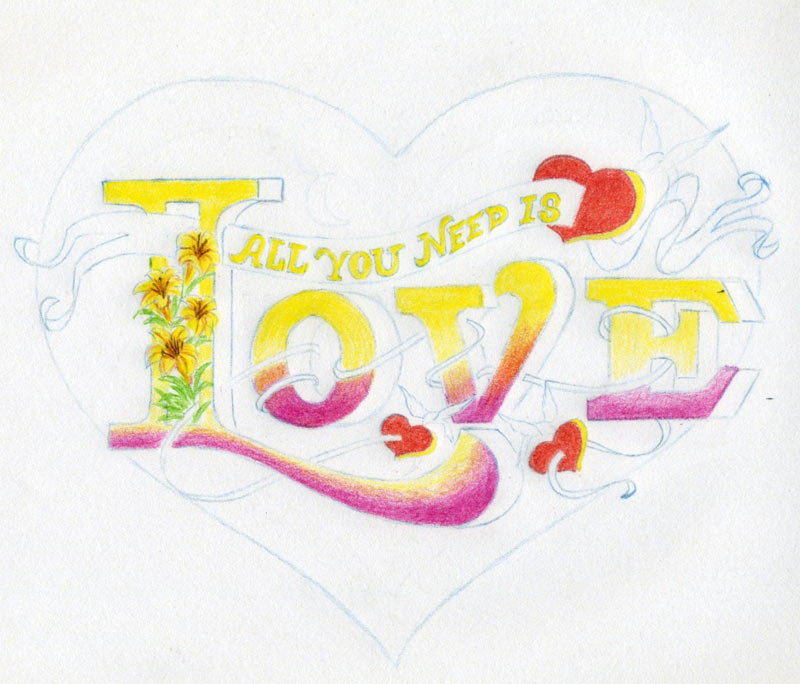
Next,
I colored pinkish and red. Note that the letters are yellow on the top,
red and orange color in the middle and pinkish on bottom.

click the image to enlarge
Add the blue and green color tone, first only to the elements. Leave the background blue heart blank for now.
Keep in mind that all letters are 3-dimensional.
click the image to enlarge
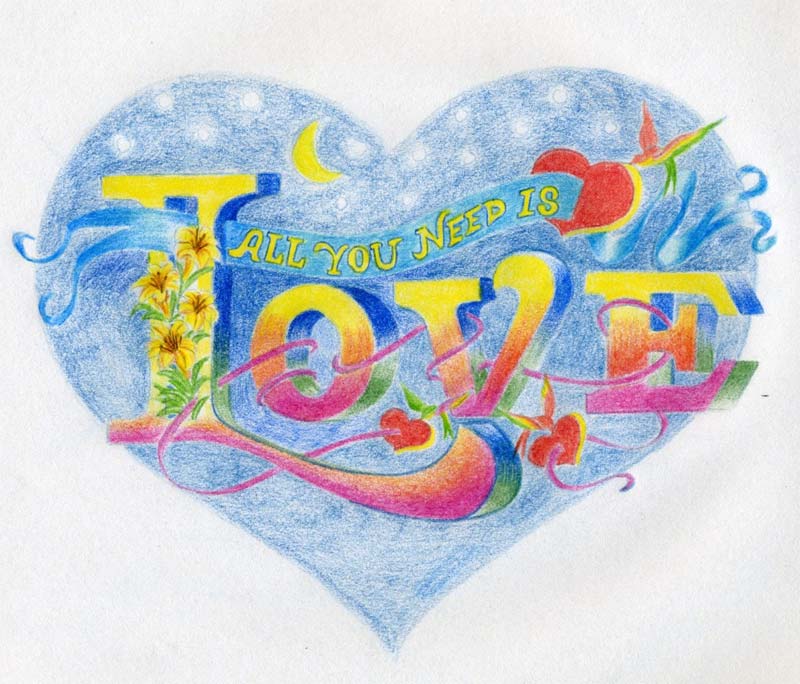
Begin
to darken the background heart with blue color pencil. If possible
color it gradually, which means, put the first layer in a lighter blue
color.
Make round pencil movements. If possible avoid straight strokes or cross hatching in order to avoid unwanted irregular shades.
This will allow you to easily erase the spots where corrections will be necessary or ease some mistakes if you make any.
Upper
space is a night sky with the moon and stars. You can color the moon
and stars in yellow. Enlarge the picture and see the details.
See, a heart can be a night sky. Wow, what a great idea!
I think that just to draw a heart without all these fantastic decorations would be quite boring. What do you think?
click the image to enlarge
Now
in order to make the shape of all letters, ribbons, mini-hearts, birds,
etc; more distinct and more alive here is a small technique:
Sharpen your dark blue pencil and draw a thin single dark blue line around all elements, except the background heart itself.
Enlarge the picture to get the idea.
click the image to enlarge
Here, I simply enhanced and sharpened the colors on computer. This looks a bit better, but someone may like the former one.